Mercenaries Walkthrough
War is hell, but luckily, it's also pretty damn profitable. GameSpot's Walkthrough to Mercenaries: Playground of Destruction will help you nab all of cards in the Deck of 52, give you tips on completing the game's many missions, help you maneuver the political minefield of factional combat in North Korea, and supply you with maps for all of the game's hidden bounty items.
Designer: Collin Oguro
North Korea is in chaos. The country's president, who was attempting to move the country towards democracy, has been assassinated; his son, General Choi Song, has taken control of the country and has expelled all foreigners. Shortly thereafter, the Australian Navy discovers a North Korean ship laden with nuclear weapons bound for a black market arms port, thus providing a casus belli for the rest of the free world. North Korea is invaded within days, and all known missile sites are quickly overrun by Allied Forces. Unfortunately, weapons inspectors reveal documents proving that Song has created another launch site at an as-yet-unknown location, and will be ready to launch his missiles within a month. That's where you come in.
In Mercenaries: Playground of Destruction, you play as an elite mercenary, sent into North Korea in the hope of claiming the open bounties that the Allies have laid out on General Song and his various generals and lieutenants. There's a whole deck of cards waiting for you: 52 separate bounties, each worth quite a bit of money. In addition to capturing these bounties, though, you'll be able to work as a soldier-for-hire for the various factions seeking to establish a foothold in North Korea. To accomplish your various missions, you'll have to take control of a number of various vehicles, ranging from civilian cars to jeeps, APCs, tanks, and even the occasional helicopter. You'll also need to master the use of support abilities, which will allow you to perform a variety of actions, from having medical supplies or weapons delivered to you, to calling down air strikes or carpet bombing.
GameSpot's Game Guide to Mercenaries: Playground of Destruction will elucidate all of the bounties and all of the missions for each faction in the game, as well as give you tips on how to raise your factional reputation levels, how to unlock the cheat codes and hidden support items, and give you maps for all of the hidden bounty items in the game. Lock and load!
Table of Contents
FactionsWalkthrough
Chapter One: The Clubs
Chapter Two: The Diamonds
Chapter Three: The Hearts
Chapter Four: The Spades
Extras
Factions
There are four main factions in Mercenaries: the Allied Nations, the Chinese, the South Koreans, and the Russian Mafia.
Allied Nations
Colonel Samuel Garret leads the Allied forces attempting to capture General Song before he can nuke the rest of the world into the stone age. Although this stolid individual initially doesn't take too kindly to the presence of a mercenary in his midst, he'll soon realize the benefit of having someone around who can cut through the red tape and get results, no matter the cost.
Most of the Allied Nations missions are "safe" missions, in that they won't usually cause your reputation with another faction to drop, since most of them are directed against the North Koreans, whom always hate you; in fact, completing them will usually give you a bonus to your factional reputation with both the Chinese and South Koreans, who are ostensibly part of the Allies, although they operate as separate factions. It'll be awfully difficult to get on the bad side of the Allies, unless you're willing to gun down numerous civilians or Allied soldiers. For most players, though, it'll be an easy task to keep the Allies friendly with you.
South Korea
The South Koreans have a more vested interest in establishing a stable North Korean government than do any of the other factions here; they've sat across a border from a increasingly decayed Communist government for nearly 60 years. As such, they'll use your abilities to strike swiftly and silently to their own ends, mostly against the Chinese.
China
The Chinese forces in North Korea, while apparently there to aid the Allies in finding General Song and his nuclear weapons, are in fact angling to take control of the country in its time of crisis and convert it into a province of the People's Republic. To this end, Chinese armor and troops are flowing into the country from the north, forcing the South Koreans to react with both subtle and overt military responses. It won't be long before the Chinese and South Korean troops will be at war with each other; your mercenary will need to either pick one faction to side with, or play them both off against each other in the hopes of earning the substantial cash rewards that each faction offers for their missions.
Russian Mafia
The Russian Mob is among the most amoral and disinterested of the four main factions; its only goal is to make as much money as possible by supplying arms and military supplies to whatever group wants them. As such, they'll fight anyone that attempts to curtail their activities, including all of the other factions. Your missions for them will mostly entail battling against the North Korean and South Korean factions, though, as those factions are the most interested in dismantling the Mob's operations in the country.
The Mafia is considered separately from the other three main factions in terms of balancing your reputation. They're not particularly interested in your derring-do, so you won't gain points with them by taking down North Korean installations; by the same token, though, they don't particularly care about the citizenry of the North Korea, so killing off random villagers won't hurt your rep with them. Since relatively few of the other factions will have missions that directly target the Mafia, it's not too difficult to keep your reputation up with them, assuming you do the missions when offered to you.
North Korea
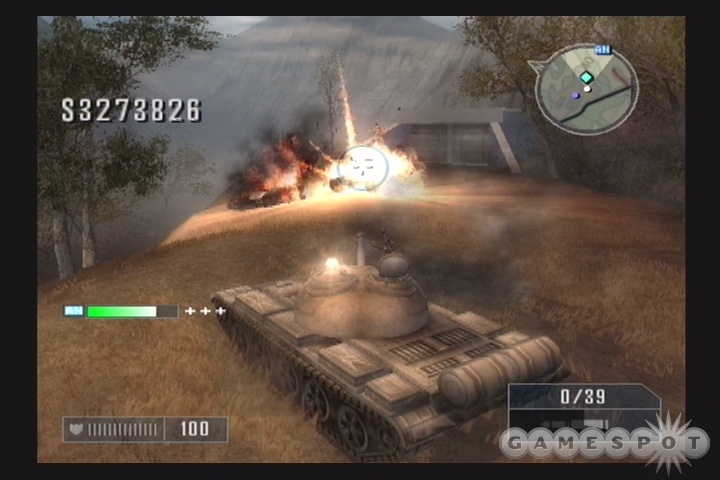
The North Koreans are the only faction that is always and permanently hostile to you and to all the other factions; when they spot you, they'll try and kill you, so you should try and kill them right back. Outside of bounties and contract rewards, the North Koreans are going to be your biggest source of cash in the game, as you'll be rewarded for each North Korean vehicle that you destroy. The amount of cash you get varies based on the vehicle; the low-end vehicles like the Sungri Scout won't be worth more than a couple thousand dollars, while tanks, FROG-7 launchers, helicopters, and the like will be worth big bucks.
Managing Reputation
Each faction in the game has its own independent opinion of you, which will vary based on your actions in the game world. This section is intended to let you know how reputation works, and give you a few pointers on what to do - and what not to do - if you're looking to maintain or improve a faction's reputation towards you.
The Faction Meter
You can check your factional reputations at any time by opening the PDA (by hitting the select button), then hitting R1 until you reach the Factions screen. This will have a readout for each of the factions in the game, as well as a word describing your current relationship with each. Your relationship with the four main factions can have one of three descriptors. You begin the game with a Neutral rating with all of the factions; they don't hate you, they don't love you, but will accept you as an asset if you choose to take on their contracts. If you build up your reputation enough, you will eventually become Friendly with a faction, which... doesn't really seem to change much. If you're Friendly with the Russian Mob, though, they will sell you items at a discount from their normal prices.
If you start to get on a faction's bad side, then they'll become Unfriendly to you. When this occurs, the Russian Mafia will start charging you more money for their deliveries, but the soldiers of that faction still won't be outrightly antagonistic towards you. If you manage to really cheese a faction off, though, they'll become Hostile to you, which is a bad thing. When a faction is Hostile, their troops will shoot you on sight, and you'll be prevented from heading inside their headquarters, thus preventing you from taking contracts from that faction. If you're hostile to the Russian Mafia, then you'll also be prevented from buying items from the Merchant of Menace. When a faction becomes hostile to you, then you can revert yourself back up to Unfriendly status by bribing the guard outside the HQ; this will cost quite a bit of money, however, up to a million dollars by the fourth chapter.
Actions That Improve Reputation
Completing a Contract for the faction: Most factions will automatically gain respect for you after you complete one of their contracts. Sometimes completing a contract for one faction can gain you respect with other factions, as well; this most often occurs with the Allies, whose missions will have a bit of a backwash effect on your reputations with the Chinese and South Koreans.
Killing North Koreans: If you kill a North Korean soldier while a member of another faction is close enough to observe, then you'll gain a small bit of factional reputation with that faction. This can add up if you manage to string together a bunch of kills while a friendly soldier is nearby. For instance, if you man a tank, then get a soldier to use the machinegun turret atop it, then park yourself outside a building or bunker that continually spawns NK troops, then you can quickly build up a decent amount of reputation.
Completing Challenges: Challenges show up on your map as dollar signs; these are somewhat akin to bonus missions, and are completely optional, but give you some easy ways to make extra cash. Some of them will also have a notice on the accept/turn down screen indicating that it will improve your reputation with one faction or another when completed.
Collecting Bounties: If you collect blueprints and destroy statues of General Song, you'll increase your reputation with the South Koreans, while collecting national treasures and destroying listening posts will increase your reputation with the Chinese. You can check the maps supplied in our Extras section to learn about the position of these items.
Turn In Cars: The Russian Mob operates a chopshop near their headquarters. If you continually deliver new vehicles to this garage, you can earn big bucks, and also gain a bit of reputation with them.
Bribing the HQ Guard: If your reputation with a faction has gone all the way down to Hostile, then you can instantly bring it back up to Unfriendly by bribing the guard outside the faction's HQ. This will cost you a pretty penny, but will let you get right back to fulfilling contracts for the faction, which will in turn let you increase your faction rating with them even more.
Actions That Don't Affect Reputation
Sniping: If you snipe a faction's soldier from a far enough distance away, the faction won't know who the killer is, and thus this won't hurt your reputation with them.
Destroying Unoccupied Vehicles: If you can get the driver out of a vehicle that belongs to a faction, then destroy the vehicle without killing any soldiers nearby, then the faction won't become less friendly to you. This can come in handy during some missions, but is generally more of a hassle than its worth.
Airstrikes: Some airstrikes can be used to kill factional soldiers without taking a reputation hit. For best results, try and be as far away from the blast as possible.
Actions That Harm Reputation
Killing Soldiers: If you shoot a member of a faction, then that faction is going to think poorly of you, obviously enough. This isn't a huge drop in reputation, so you can afford to engage in some friendly fire when it's convenient. Killing Allied troops will also ding you for 25,000 dollars per body, though, so you'll definitely want to check your fire when around the boys in blue caps.
Killing Civilians: If you kill a civilian, then you'll be charged 10,000 bucks in public relations costs, and you'll see your faction rating drop with China, South Korea, and the Allies. Most areas with civilians won't see much combat, but the little rascals are really easy to accidentally run down.

Destroying Assets: If you blow up an occupied vehicle or a building that belongs to a faction, then they'll understandably be upset with you.
Walkthrough
Your Choice Of Mercenaries
You have the ability to choose between three different mercs in Mercenaries. Your choice gives you different dialogue options between yourself and Fiona, will allow you to understand one of the three languages spoken by the three non-Allies factions, and incorporate some small gameplay differences. In truth, these differences are going to be fairly minor, making your choice here one of cosmetics rather than a pure gameplay decision.
Chris Jacobs: This former Delta Force soldier speaks Korean, allowing him to understand some of the chatter between Agent Buford and his South Korean subjects. Jacobs' game ability allows him to take a bit more damage than the other two characters before dying.
Jennifer Mui: Mui speaks Chinese, which obviously comes in handy when overhearing Colonel Peng speaking his native tongue. Her gameplay ability is apparently stealth-oriented, but, well, the whole game is more or less based on blowing stuff up, so we never found this to be very useful. You're not going to be running up behind a soldier and garrotting him before he knows why he's dead; most of your kills are going to take place with guns or explosives, and no amount of stealthy movement is going to help you avoid notice in those situations. There are a couple of missions where you might be able to avoid notice by remaining unseen, but these are few and far between.
Mattias Nilsson: Nilsson speaks Russian, letting him glean some info from the Russian Mob that might otherwise fly under the radar. His gameplay ability allows him to move a bit faster than the other mercenaries. Although this isn't really a significant boost in movement speed - 10% at most, and the other mercs move plenty fast as it is - this can still be pretty handy in tight spots. The only problem is that Mattias talks like Stellan Skarsgard's character from Ronin after he's been hit in the head a few dozen times with a blunt object - listening to his slurred, nonsensical paeans to violence over the course of an entire game is pretty painful.
How Mercenaries Works
Mercenaries, although it's quite similar to Grand Theft Auto in execution, is much more oriented towards combat than that series of games, as surprising as that sounds. There aren't going to be as many oddball missions as you might find in a GTA game; there are a variety of mission objectives in Mercenaries, obviously, but most of them will involve killing a whole bunch of enemy soldiers. Luckily, the game gives you a variety of ways in which to do this.
This section is intended to give you just a few tips on how to best go about utilizing the combat system in mercenaries, and instruct you on how to succeed in your various tasks.
Combat on Foot
You'll be on foot for much of the time in Mercenaries, as it affords you the ability to perform certain actions that aren't available while you're in a vehicle. For instance, you're unable to use your normal weapons while in a vehicle, nor can you use your support menu to call in for an airstrike or supplies, nor can you subdue or verify a bounty. The main drawback to running around on foot is that it's a lot slower than using a vehicle, and that you're much more vulnerable to enemy fire, especially that of foot soldiers.
Taking Damage
That said, your merc, whichever of the three you chose, is one tough mother, and can take a whole lot of damage before they keel over and die. Gunfire from enemy infantry will be the most common obstacle you're going to be facing, but thanks to your elite body armor, you'll only take one or two points of damage from most bullets, and you also have to factor in the fact that most enemies are poor shots at any kind of distance, meaning that you can face off against a whole platoon of enemies and still not be in much danger so long as you stay out of range of an easy shot.
Of course, explosives and sniper fire are going to be much more damaging to you than normal infantry fire. Snipers are relatively rare in Mercenaries, though, making tanks and APCs your most dreaded foes. There seems to be a cap on the amount of damage you can take from a single shot, though, meaning that you'll rarely receive a penalty of more than 20 damage or so from any given single hit; some APCs, though, can fire shells quite rapidly, letting them take you down very quickly when you face off against them in the open.
Luckily, it's still pretty difficult to die in Mercenaries, thanks to the advantages that the game gives you when you're at 20 health or lower. When you take damage that would bring you below 20 health, the screen flashes red, and you enter into a quasi-bullet-time mode for a couple of seconds, letting you know that death is imminent. Luckily, if you can find a place to hole up for a couple of seconds (such as behind a building or inside an armored vehicle), your health will begin to regenerate back up to 20. The game also favors you by having you stick at one health for a generous amount of time before dying, especially when you're taking gunfire. Although explosives can kill you outright, most mere rifle fire will take you down to one health, but won't actually kill you unless you're standing right up next to someone or are taking an awful lot of bullets. So surviving isn't too difficult, at least against infantry; dealing with tanks is a bit of a harder task.
Gaining Life
The only way to gain back health while you're on foot is to call in for medical supplies or find a medpack. Medpacks will instantly heal you to 100 health, and can usually be found inside crates or near sandbags in highly dangerous areas. You can also call in for a medical supply crate (assuming you've unlocked it in the Merchant of Menace), or grab one from the Allied Supply crate.
If you're not on a mission, then you can also select the Medivac option from the start menu to instantly gain all your life back; this will return you to the nearest Allied MASH unit, though, and will force you to leave behind any vehicles you've been using. Alternately, entering and exiting a faction HQ may get you all of your health back.
Weapons Loadout
While on foot, you can only carry two weapons at a time. One of these should always be some sort of automatic rifle; the Carbine that you begin the game with works extremely well for most purposes. It doesn't do a whole lot of damage, but it fires quite accurately over long distances, allowing you to plug soldiers while they're firing shots all over the place. You'll be able to pick up a Light Machinegun fairly early in the game, which is a better choice if you like to get up close and personal, thanks to its large magazine and slightly better damage at close range. Later in the game, the Prototype Rifle combines the best of both of these weapons, but will be exceedingly difficult to find unless you're willing to slaughter a bunch of South Koreans.
Your secondary weapon can is only a marginally tougher choice; the main decision here is between a sniper rifle and some sort of rocket launcher. Sniping enemies can be fun, but later in the game, anyone you snipe will likely just be replaced by another soldier issued from a nearby bunker or barracks. Keeping a sniper rifle by your side will also leave you ill-prepared to deal with the numerous tanks, APCs, and flak vehicles that will constitute the real threat to your safety and well-being in most missions.
RPGs are the most basic type of rocket launcher, but they'll be your best secondary weapon for most of the game. They travel somewhat slowly and inaccurately, but so long as you get decently close to your target, you shouldn't have a hard time hitting it. Two RPG rounds will be enough to take out almost any tank in the game.
Later on, enemies will show up with anti-tank rockets, which are going to be worth replacing your RPG. Anti-tank rockets can lock on to enemy vehicles (not just tanks), and will home in on a locked target when fired, making them exceedingly unlikely to miss. They also deal a bit more damage than RPGs, making most targets blow with a single rocket, which offsets the fact that you can only hold three rounds, as opposed to the RPG's four. In dire straights, you can still use them against hard targets like buildings or enemy soldiers by dummy-firing them; they'll fire straight ahead when you don't have a vehicle currently locked, but they won't deal as much damage against troopers as RPGs do, apparently.
Anti-air rockets are a little more sketchy than anti-tank rockets, if only because they seem to deal less damage than even an RPG, meaning that they can't take out even fairly weak ground vehicles, like signals jammers, in one hit. They do a number on helicopters, for sure, but then again, a normal carbine or light machinegun is enough to destroy most choppers outside of the larger cargo choppers and gunships, making anti-air rockets fairly situational.
One last weapon of note is the anti-tank rifle, which supposedly fires armor-penetrating rounds. We tested this on a tank, but found that numerous shots from the rifle just bounced off its armor, dealing no damage, just as would fire from a normal rifle. Maybe this thing is buggy, or maybe we were using it wrong, but there doesn't appear to be any benefit to using an anti-tank rifle over an anti-tank launcher, save for the fact that it can also double as a sniper rifle.
One aspect of the anti-tank rifle that does come in handy lies in disabling or jacking helicopters. You'll often see helicopters flying around; if you want to jack one, you can attempt to lure it to the ground by laying down a C4 charge underneath it and blowing the charge. If the helicopter lands, you can shoot the pilot through the bulletproof glass and take control of the chopper. This is a tricky maneuver, though, and perhaps isn't quite worth the effort, but it is apparently the only way to grab an Apache Gunship, which appears on the second map of the game.
Combat in Vehicles
Much of your time in Mercenaries will be spent fighting in or driving around in a myriad number of vehicles. As in Grand Theft Auto, getting a vehicle is as simple as walking up to it and climbing in; there are a few complications here, of course, but there are very few vehicles in the game that are impossible to hijack.
Commandeering and Hijacking Vehicles
If you want a vehicle, you'll need to somehow get to the driver's seat. For most stationary vehicles, or vehicles you see being driven along a road, this matter is as simple as walking up to the driver's side door and hopping in; if there's already someone in the vehicle, you'll throw them out.
The only cases in which this becomes more complicated involves vehicles with turrets and vehicles with manned guns. Many of the Scout-class vehicles you see on the roads, such as Hummers and enemy jeeps, will have machinegun turrets that are manned by soldiers. If you want one of these vehicles from a faction that's hostile to you (such as the North Koreans), you'll need to kill the gunner before you can jack the vehicle itself. (You can commandeer a vehicle with a manned gun from a neutral faction without a problem.) This normally isn't a big deal, as the gunners are generally quite exposed to fire, allowing you to blast them with your rifle before jacking the car itself. This is mostly a problem with tanks, when the gunner can be a small target, and difficult to hit. If you intend to jack a tank with a gunner, it's best to get right up next to it, and rotate around the tank while firing at the gunner to avoid its main cannon fire.
Tanks are also noteworthy for the fact that their jacking point changes from situation to situation; if you want to take over a tank, you'll have to first clear out the machinegunner, then run around so that you're underneath the main cannon, which is the only place you can jack a tank from. If the turret's moving around, trying to track you, then you'll have to move with it to get underneath it before you can jack it.
Helicopters, surprisingly enough, are also hijackable, although only when they're fairly close to the ground. If you spot a chopper gliding in low, then you should also notice a jacking spot moving underneath it; if you can get into this circle and hit the jacking button, then you'll take control of the chopper. In most cases, though, choppers will stay well above the minimum height required for this maneuver.
Taking Damage
One of the main benefits to being in a vehicle is that you'll be almost completely immune to rifle fire. Jeeps and other lightly-armored vehicles will still take some amount of damage from bullets, but hearty APCs and most tanks will take none at all, letting you wander right through crowds of soldiers without much fear of getting blown up. Your main sources of damage while in vehicles will be enemy soldiers with RPGs, stationary weapons, and enemy APCs, tanks, and helicopters.
Taking damage in a vehicle is somewhat of an inverted situation when compared to damage dealt to you while on foot. Damage taken above twenty will be dealt normally, but when your vehicle falls below twenty health, it will catch on fire, at which point it will begin to automatically bleed health until it explodes. If a vehicle blows up while you're inside of it, though, you won't be automatically killed; in most cases, you'll just be ejected from the vehicle, while taking a bit of damage from the explosion itself. If you manage to exit the vehicle before it explodes, then you can sometimes take no damage at all, even if it explodes right next to you.
RPG soldiers are the most aggravating of all of the sources of damage, if only because they're the one that is hardest to distinguish; a soldier with an RPG is going to be hard to spot when he's standing in a group of other soldiers with rifles. A single RPG round is going to be enough to deal around 50 damage to most APCs, and they fire quickly enough to blow you up with a second shot unless you're already looking in their general direction; if you have to rotate your turret to find them, then you're probably already dead. They also deal significant damage to tanks, but not quite in the kill-you-before-you-trace-the-rockets zone.
Stationary weapons are your next threat. Machinegun emplacements are no big deal in a tank or armored APC; their bullets bounce off your hull as would normal rifle fire. The emplacements you'll need to watch out for are recoilless rifles (essentially rocket launchers in gun form) and grenade launchers, which rapidly fire a huge number of grenades at you. Recoilless rifles will take a second to reload, letting you track them down and blow them away, but the grenade launchers can quickly reduce your vehicle to rubble with just a couple seconds worth of fire. It's difficult to distinguish between the three types of emplacements when viewing them at a distance, but luckily the machineguns are far more popular than the other two. If you're worried about taking damage, then be sure to blow emplacements from long range with your turret fire.
Lastly, there are enemy vehicles to deal with. APCs and Tanks will be common threats in any occupied zone, but can be dealt with if you spot them before they spot you and fire at them accordingly. If you get into a firefight, then try to fire on the move; it's difficult to hit them while you're speeding along, thanks in no small part to the weird controls for tanks and APCs, but they'll also have a hard time hitting you, especially if you keep your distance. Luckily, your tanks will generally be capable of taking a bit more damage than enemy tanks will, for some reason, meaning that you should be able to take out one or two even in pitched firefights.
Helicopters are going to be especially problematic while you're in a ground-based vehicle. Most of them will hit the ground if you can hit them with a shot from your cannon, but most tanks won't be able to raise their turrets to aim too high in the sky, meaning that a helicopter above you will be able to fire away at you without much fear of being shot down. As per usual, engaging them at a distance is usually the best way to hit a helicopter; if one gets above you, then your only hope is usually to start moving forward or backwards and hope that you get far enough away to get the helicopter in your crosshairs. Unfortunately, most helicopters have anti-tank rockets, and will use them, meaning that you'll soon be taken out in such a circumstance. Often, the best course of action against a helicopter is to get out of your vehicle and engage them with either your main assault rifle (for smaller, poorly-armed choppers) or some kind of rocket launcher. Helicopters will often bob and weave to avoid RPG fire, but if they're close enough when you fire, you can still take them down, even without an anti-air rocket.
Capturing The Cards
Your primary objective in North Korea is capturing the 52 high-level members of Song's corrupt regime, including Song himself.
Finding the Cards
Most of the factions in the game know or suspect the location of the cards, but are reluctant to share them with your merc, at least not until they get some sort of service in trade from you. Although the Cards exist on the game maps, allowing you to occasionally run across them if you explore the landscape a bit, the maps are fairly big, meaning that you'll need some kind of tip on how to locate them.
These tips can come in one of two ways. Most of the number cards (i.e. the people represented by the 2-10 cards in a suit), are scattered around the map, waiting for you to come along and capture them. In order to get intel on their locations, you'll need to complete normal contracts for the factions. After a successful contract, you'll normally get an email from the faction representative giving you a general idea of where to look for a card, i.e. "Southwest of Kusong" or something similar. If you poke around the area, you'll get a blue display of the card's precise location on your map, and a tone will play. (Neither of this occurs when you don't have the email intel, and the cards are usually up in the hills, out of sight from the normal roads and paths, making it difficult to just stumble across them; some of them also seem to only appear after you have the actual intel email.)
Secondly, the face cards only become available for capture as the result of completing all of the normal missions for a faction. The last mission each faction has for you during a given chapter will involve capturing or killing one of the face cards, i.e. the Jack, Queen, King, or Ace of the given suit. In order to unlock these missions, you'll need to complete one or two missions for each faction, then visit their headquarters again and pick up the last mission. These face cards don't exist on the map outside of these specific missions, so you'll have to work all of the missions in the game if you want to verify all of the cards (which gives you a unique benefit when you play through the game again in Playground of Destruction mode).
The Ace contracts are unique here; these are always given by the Allied commander, but aren't automatically unlocked when you complete all of the Allied missions for a given chapter. Instead, you'll have to gather enough intel on the Ace before the contract becomes available to you. You gain intel by capturing or killing other cards in the suit; if you verify all three of the other face cards, you'll gain enough intel to get the Ace contract. Each of the number cards in a suit will also add a bit of intel to your pool. When you reach the intel marked on the Deck of 52 tab in your PDA menu, you'll unlock the Ace contract at the Allied HQ.
(Note that unlocking the Ace contract for a chapter will prevent you from taking any Allied missions that you previously passed up. For this reason, we recommend that you get the Allied missions done at the beginning of each chapter, then save the Ace contract for last. Completing the Ace mission will also prevent you from verifying any cards that you happened to miss out from the suit.)
Verifying the Cards
In order to successfully verify a member of the Deck of 52, you'll be asked to either capture the card alive or kill the subject and verify his death. Killing is always going to be the much easier of the two options, since the Deck of 52 members aren't much tougher than regular soldiers. If you intend to kill a card, all you need to do is get close, shoot him or her a bunch of times, then step over the body and press the prompted button to snap a picture of the corpse. If you don't manage to take a picture of the corpse, then the card won't be considered verified, but will still be dead if you happen to return to the area later on in the same play session. If you accidentally kill a card, but wanted to capture him or her instead, then you can reload your game and try again, assuming you saved fairly recently. (The only difference between capturing a card and killing the target is that the bounty for a kill is reduced by half, but this is usually a negligable amount of money when factored into the cash you get for killing NK vehicles and normal faction contracts.)
Capturing a target alive is by definition more of a pain than killing him or her. The basic process for this involves stunning the target (either by hitting them with the butt of your weapon or by using a stun grenade), then subduing them when you're standing next to them. (Note that you can only subdue a card of the Deck of 52; subduing anyone else will be considered the same as killing them, with all the appropriate reputation consequences.) After you have a target subdued, they'll stay that way indefinitely, allowing you to call in an evac chopper (which is automatically added to your support menu after the subdual, or subduement, or whatever it's called).
The main problem here is that the evac chopper can be shot down, or destroyed after it lands by tanks or grenades; either case will deduct 25,000 bucks from your bankroll. It's not in much danger of blowing up due to rifle fire, and there are a pair of minigunners in the chopper to protect it, but it can still get destroyed quite easily if there are RPG soldiers, flak tanks, SAM launchers, normal tanks, APCs with cannons on them, or other helicopters in the area. In the early chapters of the game, this isn't going to be of much concern, because the cards simply won't be all that well defended, but later on, you'll have to start dealing with cards that are in areas that are simply infested with vehicles and choppers, and it will sometimes be nearly impossible to get a helicopter into areas with multiple SAM sites, let alone into areas with multiple SAM vehicles that are covered by signals jammers. (Just wait until you try to get the Three and Six of Spades alive... .) When you have support available to you, then things like Tank Busters can sometimes clear out most of the vehicles in an area, but the bounties for number cards will never go above 100,000 dollars, meaning that spending half a million bucks on support attacks to make a live capture viable isn't very cost effective. Still, it's fairly easy to make a bunch of money in Mercenaries, so if you're roleplaying one of those crazy pacifist mercenaries, then capturing all of the cards alive should be possible; you'll just need to abuse your special attacks menu to clear out anything that could possibly endanger your evac chopper before calling it in. Keep in mind that a subdued card can still be killed by explosives, though, so calling down some carpet bombing on top of his or her location isn't the brightest thing to do.
After you play the game for a bit, you'll start to get an idea for what is and isn't a viable situation for calling for extraction. If you want to play it all cautious like, then you should try to subdue every card you come in contact with before casing the area. A subdued card is less likely to be accidentally killed by your fire, and after you deal with his or her guards, you'll be able to judge whether it's safe to call for an evac chopper. If you think it'll be easier to just kill and verify the card, then you can drop a grenade or two on top of them and then snap a picture of their corpse. It's much easier to get close to a card if you have a North Korean vehicle and are in North Korean disguise; none of the cards in the game are considered officers, and few will have any officers nearby, so you should be able to sneak up to their locations, pop out and shoot them, then quickly snap a shot of them before you get pasted by the nearby tanks or choppers or whatever else is around.
Chapter One: The Clubs
After selecting your mercenary, you'll need to collect your equipment from the storage bins around the plane. There's a carbine, a PDA, and some grenades, so grab everything from their racks, then use the cargo door switch to open it. You'll soon hit the ground in an M1025 Scout, which has been disguised to look like an American vehicle. Congratulations, you're now in North Korea - time to start taking out some of your bounties!
Before you can do much of anything, though, you'll need to head to the Allied HQ, marked on your minimap with a yellow dot. (You can also check a larger version of this map by hitting select.) You'll have some obstacles in your way, though, including a bunch of North Korean soldiers; you'll need to avoid their roadblock by heading up the ramp to the left, then dropping back down to the road. You'll soon come across some Allied forces engaging more North Koreans; you can honk your horn with the O button to call them over to your vehicle, where one of them will man the turret mounted in the back. Just be sure not to run any of them over, as you'll take an instant 25,000 dollar penalty if you do so!
When you finally reach the Allied base, you'll find that it's being constantly hit by artillery shells. You should be able to make it to the entrance to the base without too much trouble, though, so wend your way through the buildings to the yellow dot on your map and talk to the Allied guard there; he'll send you in to talk to one of the men in charge, Colonel Samuel Garret. You can listen to the little spiel here, or just get up out of the chair and walk to the guy with the yellow circle beneath his feet to accept the contract. You'll need to accept it to move on with the game, so, well, go ahead and do so.
Getting To Know You...
Before you can start taking the normal missions offered by each faction, you'll have to meet up with each of them. There are four of these beginner missions; after you complete them all, you'll be able to start taking normal faction missions.
Contract: 'Ante Up'
This mission, as befitting the first real mission in the game, isn't going to be too difficult for you to complete. Your goal here is to "verify" the Two of Clubs (meaning to either capture him alive or kill him), and to destroy the artillery that's shelling the base.
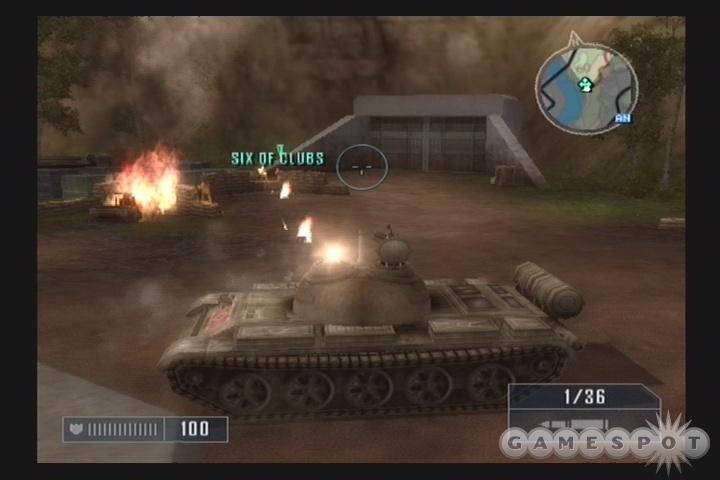
To begin with, find a healthy vehicle near the entrance to the Allied base and hop in, then honk your horn to get some teammates to ride along with you. The Two of Clubs is situated on a hill to the north of the allied base, so drive up that way until you reach his little hilltop hideaway. There are going to be a few North Koreans about, which your turret gunner will no doubt be shooting away at, but if you're aiming to take the Two of Clubs alive, be sure to park your Scout so that one of the large trucks here is between him and the humvee, so that the turret gunner can't get a clean shot off at him. Note that there's an equipment crate near one of the trucks; if you bust it open, you'll be able to find some health and ammo, as well as a very nifty rocket-propelled grenade weapon.
To subdue the Two of Clubs, which is more desirable than just killing him outright, you'll need to close in on him and beat him down. This isn't too difficult to do - although he has a machinegun, he won't be able to damage you very much if you keep running around him. When you get up close, bash him with your square button, then subdue him with the triangle button; this will lay him out flat, and let you scan the area for any other hostile soldiers. When everything looks clear, you'll have to call in an aerial pickup for the hostage. To do so, hit the D-pad up or down to bring up the menu of special attacks, select the Call For Extraction power, hit R1 to equip it, then throw the smoke grenade you obtained onto a flat patch of ground with the R1 button. When the helicopter arrives, pick up the Two with the triangle button, then use the same button to load him into it.
Now that you've captured your first card from the Deck of 52, you'll have to take out the artillery that he was commanding. It's on the northern side of his area; run back to where you found the Two and scout out the guns across the valley. To destroy them, you'll need to select the Surgical Strike option from the special attacks menu and press R1 while you target the two guns. After each of them are destroyed, you can return back to the Allied HQ for your reward, a cool $20,000. When you return inside, Garrett will refer you to a CIA man by the name of Buford, who's running the intelligence operations of the South Korean forces in the area.
Before moving out to the South Korean HQ, check out your minimap; you should see a few blue dots (representing Allied helicopters or airplanes in the area), as well as a few cash icons. One of these is situated above a humvee near the Allied HQ. Get into this vehicle to start a conveniently-placed race; when you hit the first checkpoint here, you'll be asked to make it from the Allied HQ to the South Korean HQ, which is where you want to be anyway, in under two minutes. If you do so, you'll net $5,000. Not a huge amount of money, but it's something, and you'll be making the trip anyway, so you might as well take advantage of it. After you're in the car, feel free to honk for a gunner if you want one. While racing, your next checkpoint will show up as yellow, while the one beyond that will show in turqouise. Don't worry too much about losing your way; you can make the run in as little as 45 seconds if you stick to the road, leaving you plenty of time to find your way to the base.
Contract: Stem The Tide
When you reach the South Korean HQ and accept the contract offered to you there, you'll be tasked to defend their base from an influx of North Korean forces. There are three checkpoints leading into the base, each of which is about to come under attack by a group of hostile forces, so you'll have to travel between each one and hold the line until reinforcements can come in. There's a morale meter for the South Koreans here, which will dip when one of their number is killed, or when North Koreans invade the perimeter, but this doesn't seem to have much effect on the outcome of the battle, so it's nothing you really need to worry about.
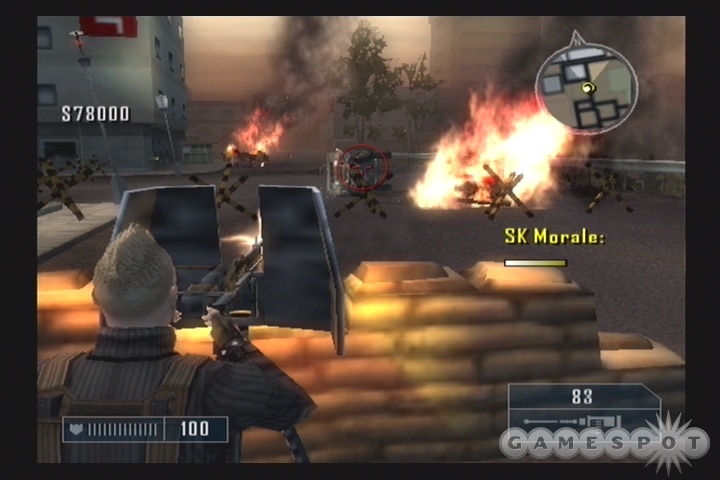
Your first checkpoint is to the north, so head out that a way and either hop into the back of the humvee, where you'll be able to use a wire-guided rocket launcher, or grab one of the machinegun turrets off to the left or right and use those. Your primary targets should be the incoming jeeps and other vehicles, as the turrets are too inaccurate to hit the infantry until they come in real close. You'll likely go through most of a 500-round clip before the North Koreans become aware of the futility of their efforts and shift over to the eastern checkpoint. A recoilless rifle is waiting for you there, and it's a vast improvement over the machineguns you were using a second ago. Although it'll take a second for the shells to reach their target, they'll usually blow up vehicles in one hit, so use it to blast anything that moves and watch your cash reserves fly.
You'll need to travel from there to the southern checkpoint, then back to the northern one before you can get the cash for the contract. Try to use the scout vehicles to quickly get from checkpoint to checkpoint; if there's a gunner manning the rocket launcher, then all the better. When you get the all-clear, you'll pick up $55,000.
Your next contract is located at the HQ of the Russian Mafia. Again, to get there, feel free to grab the scout with the $ sign over it near the South Korean HQ, which will let you enter a race to reach it. This one is mildly more challenging than the last one, because you'll have to negotiate one of the South Korean checkpoints to get out of their base, and you'll have to avoid the civilians in Pyongyang, which is where you wind up. If you run down a civilian, you'll take a fairly big reputation hit with the Chinese, South Koreans, and Allied factions, and will have to pay a $10,000 fine.
Contract: Foothold
The Mob wants a North Korean troop transport that's being held in eastern Pyongyang, and they're willing to give you a bit of a bonus if you happen to destroy three of the machine guns that are stationed around the perimeter of the base where the transport is located.
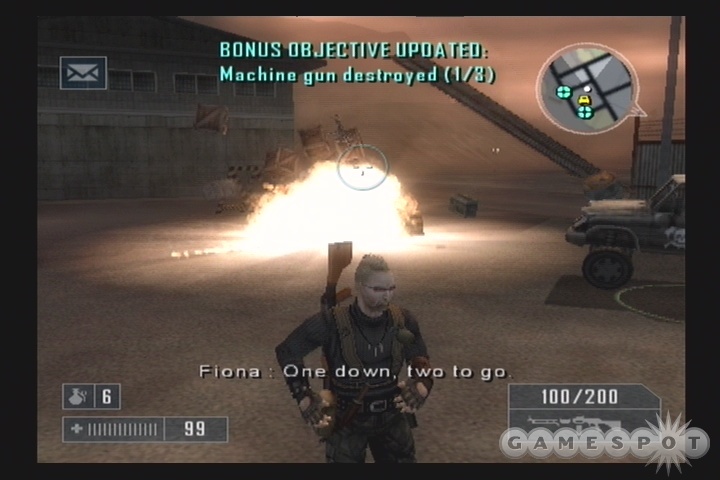
If you don't have a vehicle, then start walking towards the blips on your radar; you may come across a mobster in a Technical blasting away at a car. If you do, then hop in and start driving in towards the North Korean base, where you can use your gunner to cause a distraction while you take out the machine guns in the background. Now, you can destroy these in a few different ways, but the easiest is to use the RPG you picked up while dispatching the Two of Clubs earlier, if you still have it. You'll pick up more ammo for it inside the base, so don't worry about that. If that's not an option, then select C-4 from the special attacks menu and lay bricks of that at the base of a machine gun before detonating it. Each machine gun will require one brick, so blow them before heading inside the base. Be sure to approach them from their rear, when possible, to avoid their fire.
After you reach the interior of the base, destroy or ignore the North Korean forces and head inside the hangar, where the transport awaits. There are also a number of crates around, which you can smash for more health and ammo. There will also be a couple of RPGs in the rubble, as well as an SMG, if you're into up-close killing.
When you're ready to drive the truck out of the base, kill off any nearby North Koreans before getting in. So long as you're not seen when you enter the vehicle, you'll quickly gain a North Korean disguise and will be able to exit the base without taking fire from the soldiers there. The Mafia goons near the garage will fire on you, but they shouldn't be able to do much damage to you before you drop the vehicle off and net your reward: $30,000, plus an extra 10k for taking out the machine guns.
Your next meetup is with the Chinese forces. In order to get there, find the racing Technical behind the mafia HQ and use that to race over there. This track is a bit more difficult than the previous ones, involving a couple of right turns and one nearly imperceptible gate that'll send you flying if you run into it while moving too fast. Still, you should be able to clear the track in plenty of time.
Contract: Pest Control
If you had fun with the South Korean HQ defense mission, then this contract should be right up your alley. For one thing, you're going to be able to use a tank, and for another, you'll be tasked with destroying a few buildings. It'll be a real blast, yuk yuk yuk.
To begin with, hop in the tank near the Chinese HQ and start getting used to the controls. Tanks have a much different control scheme than do normal cars, mostly because they don't use the X button for acceleration, for some unknowable reason; instead, you'll be using the left analog stick for all of your movement needs, while the right analog stick will control the rotation of your rocket turret. When you're ready to move out, honk your horn to get a couple of soldiers in your rear, then start following the road to the south that leads to your radar blip. There'll be a Chinese roadblock eventually; honk again to see about getting some more helpers.
After you reach the end of the road and get the signal that you're approaching the museum, you should see four buildings highlighted in turqouise; these are the barracks that you can destroy to earn your bonus money. If you want, you can destroy them with your tank's rockets, although they'll take four or five rockets apiece. There are big grey boxes of ammo scattered about, though; if you run out of shells, drive over one of these to get a full reload. You should use at least one rocket round to destroy the alarm tower near the barracks, though, as this'll help reduce the number of NK troops you have to kill.
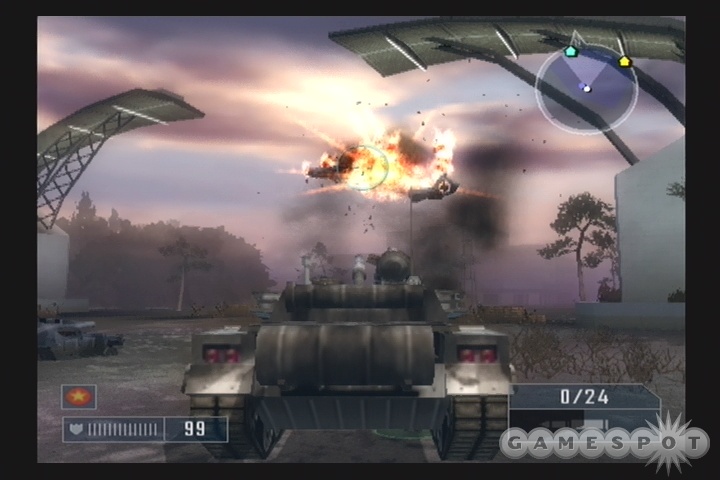
In addition to the barracks, there are two large red buildings on either side of the main square; there are rocket soldiers up here, so destroy them before attempting to pass, if at all possible. There are also two small artillery pieces which cover the main square. If you destroy them, they'll be worth 5k apiece; you should also destroy the statue of General Song in the square for the large cash bonus that brings. If you don't destroy the artillery pieces, you can use them to destroy the statue and the barracks; you should also have a couple of artillery strikes in your special attacks menu that you can use to destroy the museum and any other targets that you might like to hit. If you want the bonus cash, though, you'll need to destroy the barracks before you take down the museum. If you do so, you'll earn 40k in addition to the 50k you get for the museum; not too shabby.
Now that you've taken a contract with each of the factions and familiarized yourself with all of them, you'll be able to take on jobs from all of them, if you wish; all of their flags will appear on your minimap. There's no particular order in which you have to proceed, and you can indeed do all of the missions given to you, assuming you don't go around killing members of a faction or otherwise lowering your reputation with them. Some of the faction missions will involve killing or otherwise acting against the members of another faction, so you'll need to proceed carefully if you don't want to wind up blocking off some of the faction missions. In other words, don't run down civilians or kill members of a faction, except when required by a mission.
Allied Missions
Contract: Out of the Woodwork
Your goal here is to destroy three North Korean tunnels. You'll be given two Surgical Strike special attacks with which to do so, but you'll need to be crafty in taking out the third. If you still have an RPG, you can use that; if you still have the Chinese APC you picked up from the Pest Control contract, that'll do nicely as well. Plastic Explosives will do the job, although you'll be getting a little closer than comfort would usually permit.
When you accept the contract, find a vehicle and load it up with Allied troops, then head west along the road until you come to the first bunker. North Koreans will continually stream out of it until you blow the bunker, but if you have plenty of ammo, feel free to just mow them down as they arrive; if you kill them in the presence of Allied troops, you'll continually gain faction bonuses. When you're ready to kill the bunker, though, you can sneak around behind it, grab the technology briefcase, and use a C4 charge to blow it. This will help you save the surgical strikes for the remaining bunkers. You can use the ramp on the northern side of the road to stay out of the main firefight there, but be mindful of the North Korean troops, as they may pack RPGs.
When you reach the final two bunkers, blow them from a distance with your Surgical Strikes. You may be able to get both of them at once with a single strike; if not, you should have both remaining, so blow them up to finish off the mission and get your cash.
South Korean Missions
Contract: A Proper Function Of Government
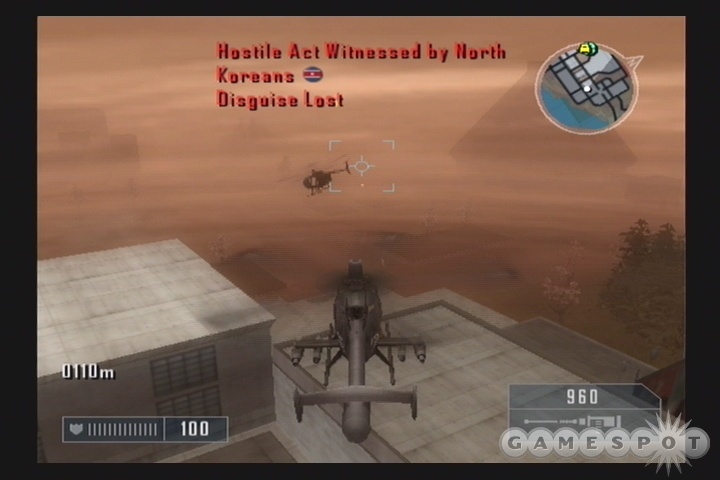
Buford wants you to extract a South Korean intel operative that's being held captive by the Chinese government at Pyongyang airport. Theoretically, he doesn't want you to be spotted, but this is nearly impossible to accomplish; your best bet is to bust into the airport in a Chinese vehicle, find the agent, honk your horn to get him in your car, then get back out and quickly return to the South Korean HQ to drop him off. So long as you don't kill a bunch of Chinese here, your faction standing with them won't drop too much.
Luckily, the South Koreans will provide you with a pair of Chinese vehicles which you can use to get into the airport. Take the smaller scout vehicle and start heading out to the airport; it's a long ways away, so plan your trip via the map. When you reach it, you'll be able to enter through the main gate, which will unlock itself if you're still in a Chinese vehicle; otherwise, you may have to plow through a portion of the gate to gain access. There are three spots marked on your map, so check them out in turn to find the South Korean agent. When you do, you can honk to have him run over to your car. This will break your disguise, though, so you're almost guaranteed to get the Chinese in the area aggravated. Whatever you do, don't kill any of them; just return to the gate and get the heck back to the South Korean base. You may have to run through some Chinese roadblocks, but again, just don't kill anyone, and you should be fine.
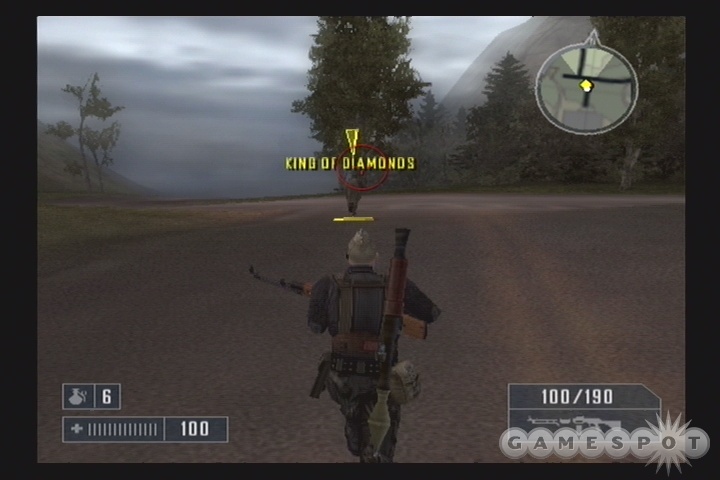
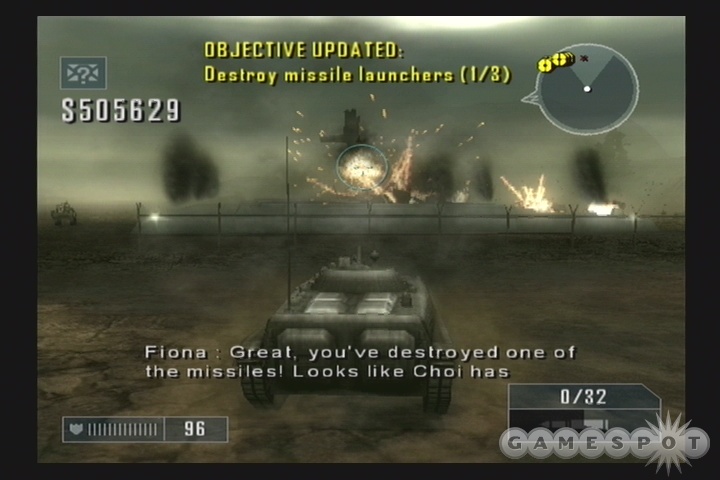
Contract: A Farewell To Kings
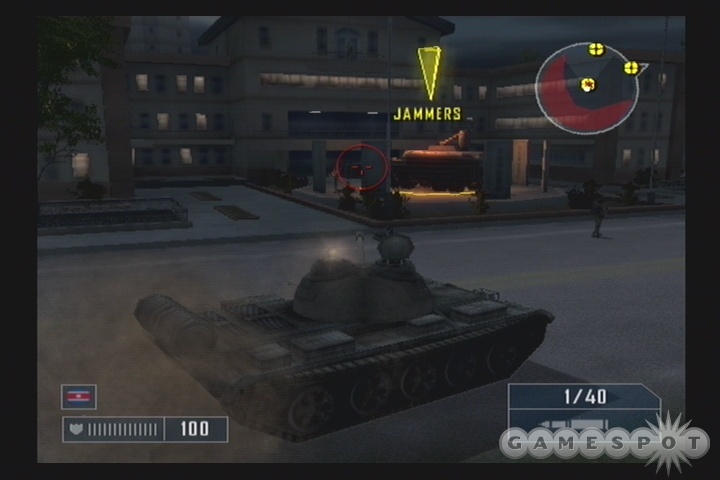
Finally, some big money. The South Koreans are going after the King of Clubs, whose bounty is up to $125,000. In addition, they want you to take out the missile launchers stationed around Ichon. This is going to be difficult to pull off by yourself, so grab a humvee and load it up with South Korean troops before moving up to Ichon.
Now, if you approach from the west, you'll notice that the NK troops have signal jammers in place; this will prevent you from using any of your special support attacks. Another thing you'll notice is that there's a large APC in place near the western entrance to Ichon. This should be the first thing you jack here; you may need to approach on foot from a way out to avoid its shells and the rockets the NK troops will be firing at you. When you have it, though, you'll be able to resist most of the small arms fire coming your way; you will still need to avoid the rocket launcher peeps, who mostly fire from the hardened towers scattered around the facility.
The three sets of rockets are clearly marked on your minimap, even if the map itself is no longer visable. Since all of the rockets are fueled, you should be able to take out a cluster of them when you detonate one. Try aiming for the middle target first. Also of note is the fact that the radar jammer is noted on your minimap with a red X; you'll want to take it out so that you can use your stealth bomber attack. Feel free to use it on any remaining rockets. Also note the FROG 7 portable missile launchers (they look something like SCUD launchers) parked near each of the rocket pads. When you blow these up, they'll take out anything nearby (including you, so hit them from a distance) and net you a sizable amount of cash.
Now, when you have the rocket pads finished off, you'll have to get to and subdue Choi. He's on top of the largest building in the facility, near where all of the helicopters are parked. In order to reach him, you'll have to jack one of the helicopters parked on the ground; there aren't any stairs leading up to the roof. The controls are simple to learn: X brings you up, square lowers you down, while the right and left analog sticks will move you around and let you target your vulcan cannon. You obviously don't want to use this on Choi himself, though; instead, land on the roof of the building, run down to him, subdue him, then call for an extraction on the flat rooftop surface. The extraction helicopter should have no problem coming in and getting Choi, at which point you'll gain a cool 125,000 dollars.
Chinese Missions
Contract: No One Will Ever Know
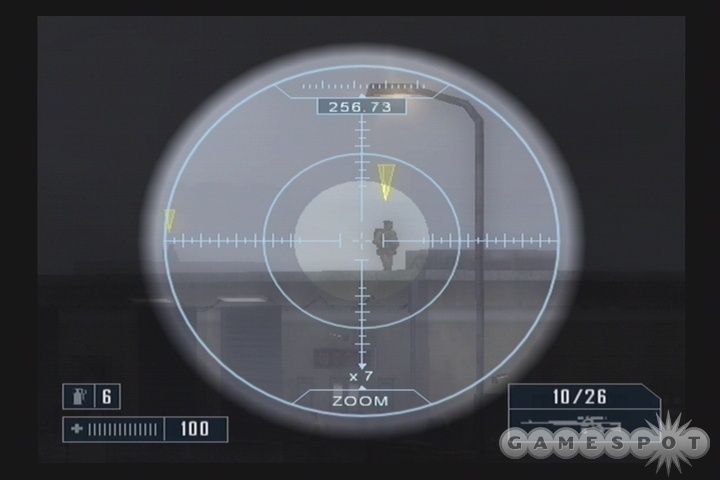
Your goal here is to eliminate three high-ranking members of the Russian mafia. If you want to complete this mission without seeing your factional relationship with the Russians take a severe hit, find the Covert Weapons Drop in front of the Chinese HQ and smash it open. There's a Covert SMG inside, which is nice; what's nicer is the Sniper Rifle, which will let you take down your targets from a mile away. Evading Mafia detection altogether is going to be difficult, even for Jennifer Mui, but it's doable if you engage your targets from maximum range. Fifteen thousand bucks isn't a big deal, though, so you may not want to bother worrying about it.

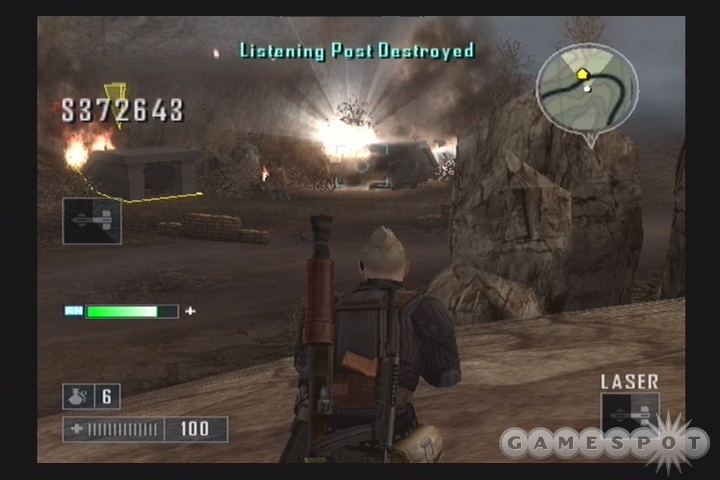
When you reach Haeju, you should be able to take out the eastern and northern targets by finding sniping spots just on the border of the Mafia territory and taking them down from afar with the sniper rifle. If you linger in the area too long after killing off your target, though, you'll be spotted. This is kind of beside the point, anyway, since the southernmost target will be pretty much unhittable unless you enter the Mafia territory, which will pretty much guarantee that they'll spot you. Still, so long as you can avoid their fire and take out the last target without killing any of the rank-and-file troopers, you should be able to avoid taking a reputation hit. (For some reason, killing the officers won't cause the Mafia to think ill of you, although this might change if you're being directly observed while you pull the trigger.)
For the southernmost officer, we found it easiest to enter the city from the northeast, then run down to the body of water near him, staying on the far side of the wall from the street to avoid taking too much damage from the Mafia (who will shoot on sight since you're in their territory). When you've popped him, just run out of the zone, ignoring any fire you take, until you're back in neutral territory, then head around to the docks and meet up with your Chinese contact, who'll give you your reward.
Contract: Under New Management
Now that you've proven your worth a bit, Peng will ask you to secure the port city of Nampo, which is under the control of Song's troops. If you do so, he'll give you the intel on the Queen of Clubs, making this another two-part mission.
When you're ready to head out, try to grab any ammo you can for your sniper rifle. Your goal in Nampo is to take down six individual North Korean soldiers, and this is easiest to do if you can sit outside the city and pop them from long range. You may have to move around a bit to get eyes on all of them, but so long as you stay well away from the many guards in the area, you shouldn't have too many problems. Alternately, you can scout the docks on the western edge of town to find another tank-like APC, which will render the killing of the six guards a cakewalk. Just be mindful of other hostile APCs, who'll fire on you if you're seen.
After killing all six of the North Korean targets, you'll get the intel on the Queen of Clubs, who's conveniently located on the western docks. He's surrounded by troops, of course, so you'll need to thin the ranks a bit before you head in and stun him. Your APC, if you still have it, can do the job by firing at each soldier's feet. When you feel like you've cleared out enough space to grab the Queen, run up to him, stun him, subdue him, then call for an extraction and get him out of there for the huge bounty.
Mafia Contracts
Contract: Gimme My Money
This is another inter-faction mission, in which the Mafia will ask you to take out a Chinese officer and retrieve a stockpile of cash that the Chinese have taken from them. To this end, they'll supply you with a attack helicopter that has a winch attachment beneath it; you can use this to both kill the Chinese officer (for the bonus cash) and grab the crate of money (for the main mission completion).
Begin by taking the helicopter up and flying over to the point marked on your map. If you spot any North Korean helicopters in the air, feel free to shoot them down for a little extra cash. When you reach the Chinese building, you'll find that it's surrounded by soldiers, as well as the officer, who'll be marked in turquoise. Since you won't be able to kill him without the soldiers spotting you, you'll almost certainly lose a bit of faction points with the Chinese, but so long as you kill only the officer, this penalty shouldn't be too devastating.
When you're ready to grab the cash, lower your winch by pressing the D-Pad downwards and hover on top of the cash to pick it up. The soldiers below will, of course, take exception to your actions and will attempt to blast you from the sky, but they only wield machine guns, and so shouldn't be able to do too much damage to you if you manage to get the crate and get back up in the air quickly. If you find yourself about to get shot down, though, you may want to either start shooting up the soldiers and take the Chinese faction hit that comes along with that course of action, or landing the helicopter and calling in a Vehicle Repair Drop before trying again.
When you have the cash firmly attached to your winch, take to the skies and head back to the point marked on your map. You'll need to drop the cash inside the circle by tapping your d-pad downward, then return the helicopter to the landing pad you originally took off from to complete the mission. In order to return to street level, use the door in the small hut elsewhere on the rooftop.
Contract: Bait and Switch
The Mafia offers to lead you to the Jack of Clubs in thanks for your previous help. If possible, he wants you to capture a FROG-7 missile truck from the Jack of Clubs' little base, but this just a bonus option. Your primary priority is to enter the base and nab the Jack.
To that end, you'll be provided with the NK troop transport you stole earlier, along with a bunch of Mafia thugs. This will let you get near the base where the Jack is holed up, so head that way. Before you hop out of your truck to start taking out the enemies, though, drive past his marker and up the hill to the green car icon on your minimap. If you get out of the truck near the FROG-7 missile launcher, marked in turquoise, one of the Mafia soldiers will get in. In order to get it out past the Jack, though, you'll need to destroy three heavily armored vehicles on the road down the hill.
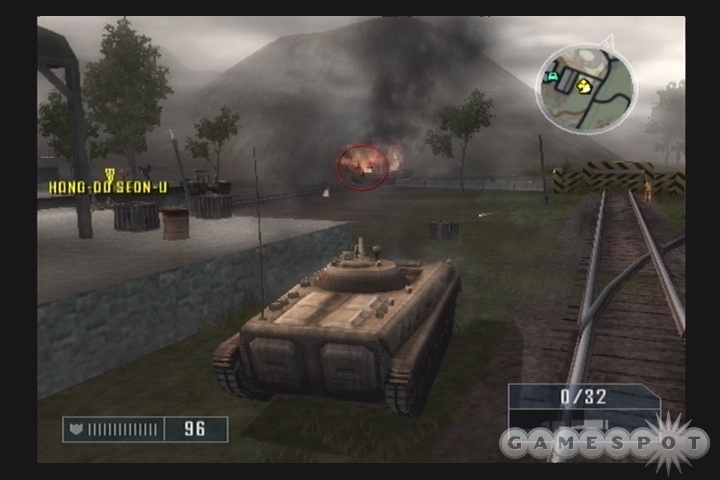
The easiest way to do this is to approach the vehicles from the rear, meaning the south. If you scout around on the southern side of the train station where the Jack is, you'll find another APC of the cannon-equipped kind; if you just run up to it and hijack it, you should be able to nab it before either it or the soldiers nearby know what the heck is going on. With it at your disposal, you'll be able to sweep north, firing away at the three armored vehicles and destroying them, which will allow the FROG-7 truck to get down the road and out to the highway, where Sergei can presumably use it for his own nefarious ends. Be sure not to aim the cannon near the Jack, though, unless you actually want to kill him.
To take the Jack alive, you'll want to use the APC to destroy any opposition that's suitably distant from him, then dismount from your ride and start killing off the nearest soldiers up close before subduing the Jack and extracting him. Note that if you chose not to do the optional FROG-7 extraction, you'll still want to take out the anti-aircraft vehicle (the one with the pair of smaller cannons in the front), or it'll likely shoot down the chopper that comes to pick up the Jack.
Capturing The Clubs
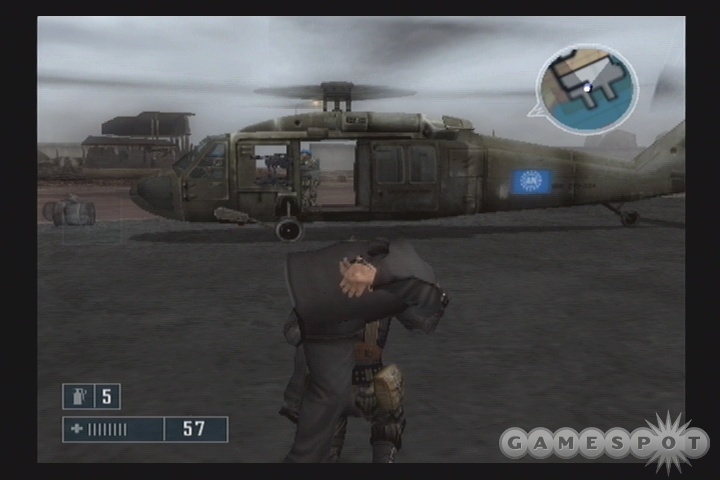
Finding the clubs can be difficult; it's best to have some kind of helicopter to get yourself quickly around the map. You can find one to the southwest of the DMZ, across the river from the Allied HQ, near where the paved road turns into a dirt one. This big UH-60 doesn't have any weapons that you can control, but it does have a pair of mounted miniguns that Allied soldiers will fire automatically if they spot an enemy.
Three of Clubs: The description for the Three of Clubs that Fiona gives you ("South of Pyongyang, across the river") is vaguely accurate, but he's well off to the west, and is in fact closer to Nampo than Pyongyang. If you follow the road leading from southern Namp to the Allied MASH station, he should pop up on your map, but the road leading to him is even further south; it's the one connecting the NK Artillery Base to the NK Base near the middle of the map. He's lightly protected; if you can man the BRDM Scout turret near him, you should be able to kill all of the soldiers, leaving you an easy subduement.
Four of Clubs: The Four is located in the Farmlands just north of Haeju, right near the "a" in the "Farmland" label on your map. He's not difficult to kill, but he is located near civilians, some GSRN reporters, and an explosive barrel, meaning that you'll have to be quite certain that you aren't aiming at something sensitive before pulling the trigger, unless you're crazy like that. The GSRN cameraman will insist on filming your capture, so let him; killing him will incur a substantial financial penalty.
Five of Clubs: The Five is one of the easier Clubs to capture. He's located in a little construction site to the northwest of the northern half of Pyongyang, connected to the city by a paved road. He only has a few guards to deal with, so take them down, subdue him, then call for an extraction.
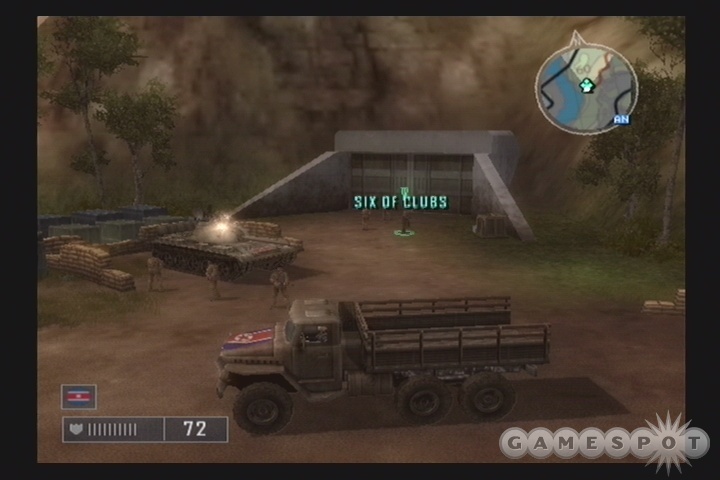
Six of Clubs: The Six is located at the end of a dirt path, on a hill to the southwest of the Mafia's HQ in East Pyongyang. He's extremely well-protected by both a gaggle of soldiers and a tank, so if you're going to try and take him down, you'll be best served by either going in with a humvee loaded up with soldiers of your own, or infiltrating with a North Korean vehicle and attempting to get as close as possible to the tank before hopping out. If you jack the tank, you should be able to kill most of the soldiers before getting out again and subduing the six. Of course, if your only objective is to kill the Six, then you can go in guns blazing. When you've extracted him, you can bring the T-54 tank to the Mafia's chop shop for an extra 20,000 dollars.
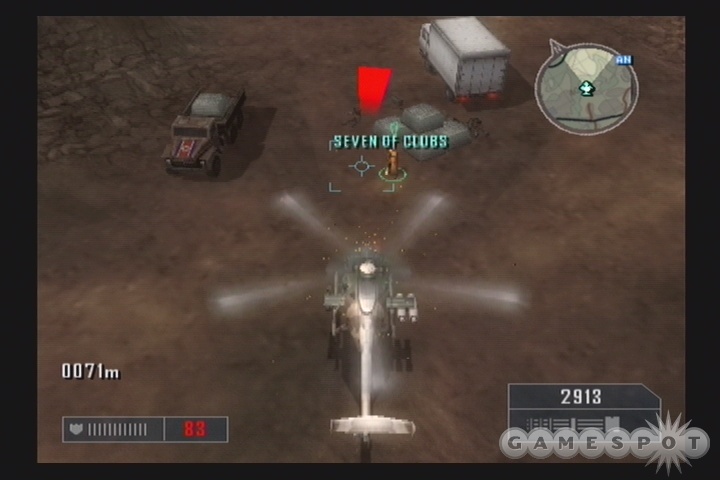
Seven of Clubs: The Seven can be difficult to find; he's in the hills to the southeast of Kaesong, right near the marker designated 40 on your map. In order to get him, you can follow the rough path from the road north of him (the paved road is on your map, the road leading to his area is not), or grab a helicopter from the North Korean base near the 41 marker and fly over to him. He's standing next to a huge supply of cash, so kill his soldiers, subdue him, then bash the crates open to grab a whole boatload of extra money. There's another crate in the rear of the truck nearby him, so get that too.
Eight of Clubs: The Eight is located in Downtown Pyongyang (i.e., on the eastern end of the small island in the middle of the river.) He's well protected by soldiers, but he's also standing next to a crate full of first aid packs, so if you can get underneath the overhang of the hotel and engage his troops at close range, you should have multiple life bars to play around with. Killing the Eight's guards without taking him out may be difficult, so you may want to make a beeline for him and subdue him before shooting out the rest of the soldiers in the area.
Nine of Clubs: The Nine is well north of the Allied Nations' headquarters, at the end of one of the dirt road sections up there. He's going to be difficult to get to without help, since the path leading to him is crawling with North Korean soldiers barricaded behind sandbags. If you want to take the path, you'll want either a North Korean vehicle to get you up to the end, or some kind of tank or APC to withstand all of the shots you'll be taking. Alternately, you can just fly up there with a helicopter and use its minigun to kill all of the Nine's defenders before landing and subduing him, but you'll have to be careful because of the way that North Koreans will pour out of the bunker nearby. In order to safely extract the Nine after you take him down, you'll likely need to either move or destroy the helicopter on the helipad nearby, as that's one of the few places in the area with enough room to bring down the evac chopper.
Ten of Clubs: To find the Ten, you'll need to get south of the road that leads southeast from the Propaganda Village. He's situated on the train tracks there (near one of the dollar signs on your map), but has a lot of protection, including anti-air vehicles, so don't attempt to approach with a helicopter. If you approach along the tracks (which is really the only way to get close to him), you can either massacre your way through the troops, or start picking them off from long rang with a sniper rifle.
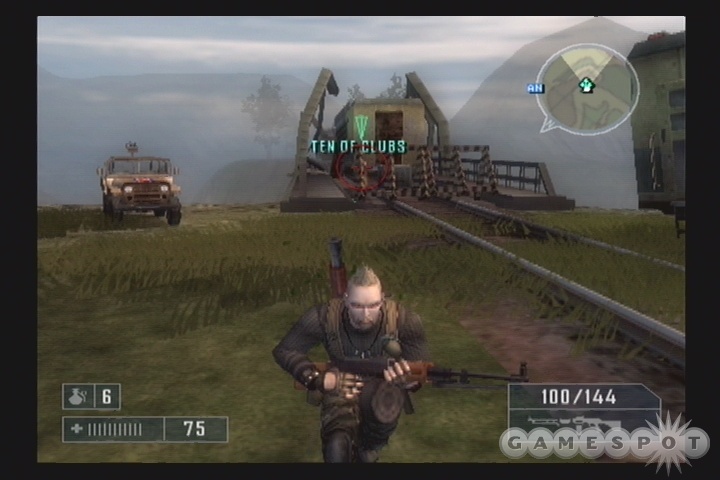
When you reach the Ten, you'll have to extract him, but this can be difficult due to the presence of the anti-air vehicles in the area. There's one in the valley south of the Ten's position and one on the hills to the northeast. They're far enough away to probably not cause any problems, but if you wish, you can take them out with some air support before you call for the extraction.
Boss Contract: The Ace of Clubs
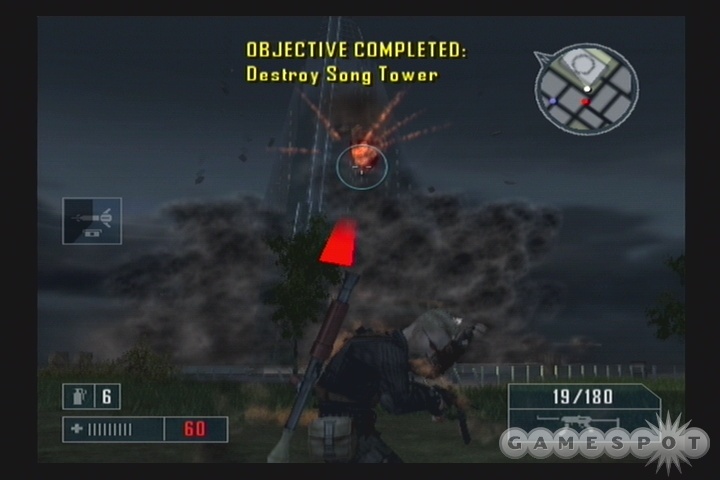
Contract: Bringing Down The House
Your first Ace contract takes place on a heavily fortified island where the Ace of Clubs has holed up, inside a fortified building known as Song Tower. You have two primary and one bonus objective here: the primaries involve clearing out three NK radar jammers scattered around the island, then using your satellite signals to track down and verify the Ace of Clubs. The bonus sees you clearing a spit of land on the southwestern edge of the island and ensuring that a supply helicopter can drop.
Your first goal, though, is to survive your landing, which will take place while you're under fire from NK forces. If you don't want to deal with dispatching the group of enemies at your landing zone, just head down to the water and use the small slope there to protect yourself from their fire. If you do happen to chew through them, then you should be able to grab one of the jeeps nearby and use it to disguise yourself, allowing you to roam the island at your leisure.
Bonus Objective: Whichever your tactic, you'll almost definitely want to head to the bonus objective marker immediately after you arrive. It isn't necessary to complete the mission, but obtaining the help of a half-dozen Allied soldiers will make your life much easier. Unfortunately, the zone is guarded by a half-dozen NK troops, as well as a couple of helicopters. These latter will be the tougher part of the equation; if you want to take them down, you'll probably have to use the AA vehicle nearby, as helicopters are quite able to dodge RPG fire unless you're at close range. If you do use the AA vehicle, be sure to take down the choppers before killing the sixth soldier on the ground, as that will trigger the arrival of the supply chopper.
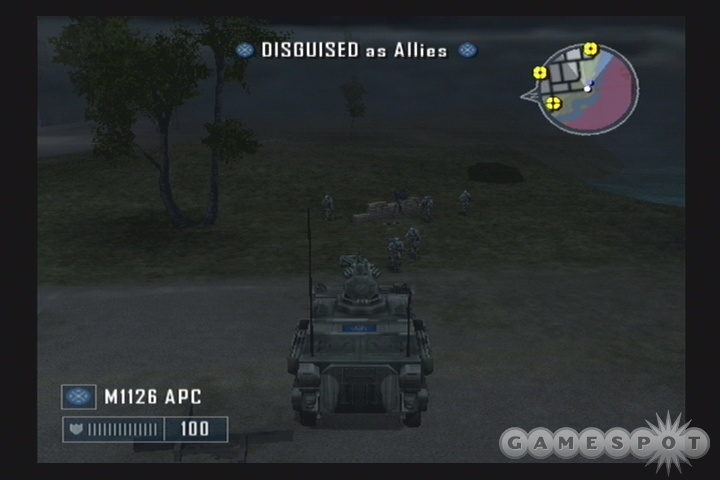
When the supply chopper comes in, you'll be pleased to note the arrival of the aforementioned soldiers, and an Allied M1126 APC Delivery will be granted to you; use it immediately to grab a pretty serious armored vehicle, which should let you withstand anything up to enemy RPGs (which are unfortunately rather dense on the island, meaning that you shouldn't run right up to concentrations of enemies).
First Objective: In order to kill off the three jammers, you're going to either need some better equipment or use your Cluster Bomb or Tank Buster special attacks. Unfortunately, most of the jammers are situated in positions such that you're required to get awfully close before you can use these attacks, meaning that you'll be in their zone of signals interference, meaning that you won't be able to select said attacks. Thus, you'll normally be forced to leave your vehicle and use either an RPG or a bunch of grenades on the jammers to take them out.
The most palatable alternate here is to get yourself a tank. There is indeed a T-54 guarding the southeasternmost jammer; if you can get in close, either on foot or in a North Korean vehicle, you should be able to kill the gunner atop it, then hijack it by getting underneath the turret. This is the best bet for killing the rest of the jammers without taking an absurd amount of damage. Your Allied friends won't be able to come along, but you will be able to retain one of them to man the gun mounted atop the turret. The main problem here will be avoiding the RPG rounds that will periodically come your way, but if you wait long enough to get disguised as a North Korean, you'll be able to place the tank in such a manner that you can fire off around, blow a jammer, then run away before the NK troops even know what's going on; just keep an eye out for officers, who'll use their X-Ray vision to see through the tank walls and figure out that you're a vicious mercenary.
Another alternative is to grab a helicopter. There's a semi-hidden airbase on the northeastern end of the island, to the southeast of the northernmost jammer. It's well defended, with a couple of machinegun emplacements and a barracks that will endlessly spew out soldiers, and the helicopter will also be manned and flown away as soon as the soldiers within detect your presence. Your only real hope of getting it is to enter the base in a North Korean vehicle, park it next to the helicopter, then jump into it as quickly as possible. This isn't as preferable as the tank option, though, since the NK troops do have a bit of anti-air scattered around the island.
Whatever your techniques, you'll have to destroy all three jammers before you can acquire Hwangbo's transmitter signal.
Second Objective: After you locate Hwangbo, you'll be given a Bunker Buster special attack, which will be just what the doctor ordered to destroy Song Towers. If possible, try to use the laser designator from the northeastern corner of the island, as this is where Hwangbo will run after the Tower is destroyed; how he manages to survive the destruction of such a huge building is anyone's guess, but survive he does.
After you blow the building, a few enemies will spawn in the form of a helicopter or two and some more jeeps, but your primary goal is to track down Hwangbo before he reaches the helipad. If you're already standing between him and it, this should be a simple matter of waiting for him to come to you before knocking him senseless and calling for an extraction. Although you may have a few enemies in the area, you should be able to call for the extraction right away. Since evac choppers are equipped with miniguns, they'll be able to defend themselves while they settle down, and the mission will end as soon as you load the Ace onto the chopper, meaning that all you have to do is ensure that they can safely land. If necessary, leave Hwangbo on the ground while you take down any nearby enemies before calling in for the extraction.
Alternately, you can of course just pop Hwangbo in the head with a bullet and settle for half of the bounty. His bounty isn't big enough to warrant too much trouble, especially since a death here means that you'll have to go through the rest of the mission all over again.
Chapter Two: The Diamonds
Allied Nations Missions
Contract: Embedded
This is something of a taxi mission, where you're contracted to ferry a journalist from site to site within an alloted amount of time. In order to start the mission, you'll need to head northwest of the Allied HQ to meet the journalist. From there, you'll need to take him to Ichon, then to Pyongyang, Nampo, Haeju, Propaganda Village, and then finally drop him off at a train station.
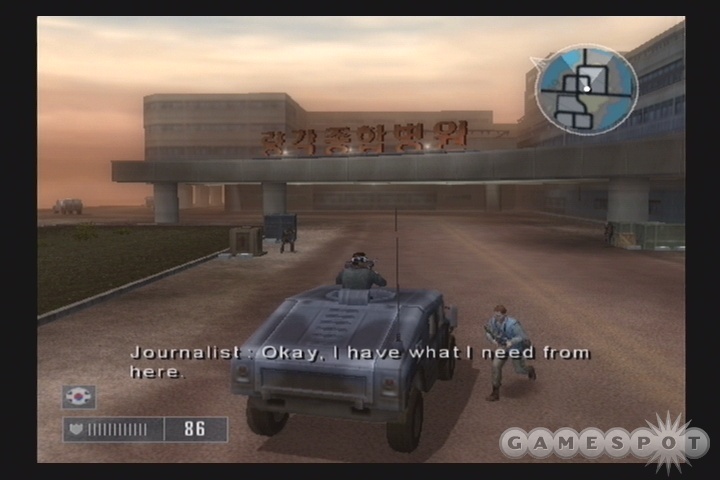
The main challenges here involve obstacles on the roadway; so long as you proceed at a brisk pace in a fast car, such as the Scout you're likely to pick up right at the beginning of the mission, you should be able to get to each checkpoint with a good surfeit of time. There will be various roadblocks, though; you'll occasionally come across firefights between North Korean and factional troops, or a traffic accident around which civilians happen to be milling, forcing you to slow down to avoid hitting them. Still, so long as you can avoid tipping or overturning your car, you shouldn't have a problem keeping the journalist alive, as none of the factional forces you run across will treat him as hostile.
Contract: Downed Bird In Enemy Nest
A UH-60 chopper has crashed behind enemy lines, and you're being sent in to rescue any survivors before North Korean reinforcements reach the crash site. In addition, the Allies will give you a bonus mission, which entails taking out three anti-air emplacements in the area around the crash site.
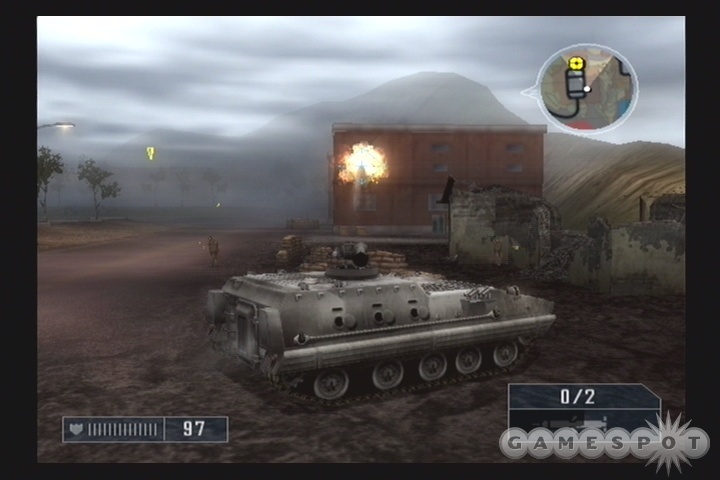
To begin with, head out along the bridge heading west of the Allied HQ; you should note an APC parked on the far side of said bridge, with a soldier already manning the turret, so hop in and start driving along the dirt path leading up to Ichon. Don't worry about the break in the road; there's a bridge across the ravine at this location that'll let you keep moving. When you reach the dirt road leading to the crash site, you'll have to maneuver your way through a firefight between NK and South Korean forces, so just jam on the gas and get onto the road. That isn't your fight.
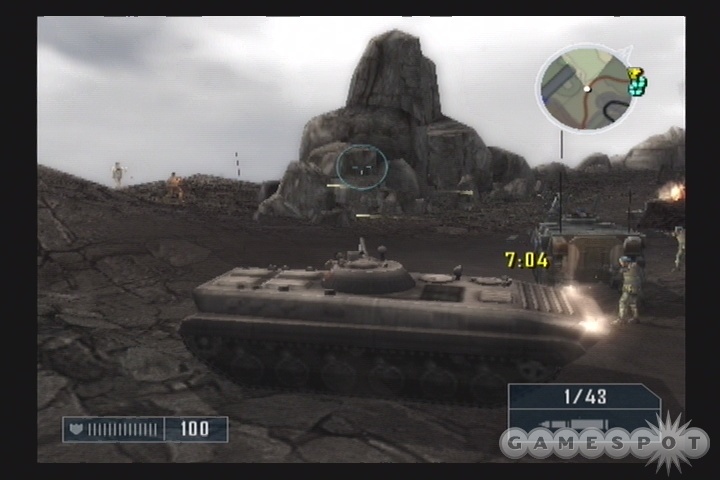
The first antiaircraft location will be your first challenge, as there's a tank-like APC waiting for you. Your goal here should obviously be to hijack it before it can rip your own APC to shreds; it'll also make a handy tool for blowing the anti-aircraft vehicles in the area. Be sure to get all of them before heading towards the survivors, if you intend to nab the bonus cash for this mission. Actually, it'll be much simpler completing the mission as a whole if you go ahead and take out the AA, so you'll probably want to do so. The bonus is substantial, as well.
The reason for this is that extracting the soldiers is going to be mighty difficult unless you have a vehicle, and whatever you have is likely going to be destroyed by RPG fire. To even get to them, though, you'll want to clear out the entire area nearby their position to ensure that they aren't taken out by stray bullets when you attempt the extraction. If you still have the BMP APC in your possession, its shells will do the job quite nicely, but again, beware of RPG fire. If you're vehicleless, you might want to use your free Surgical Strikes in the special attacks menu to take out the buildings near the soldiers; this will have the added benefit of killing any NK troops nearby.
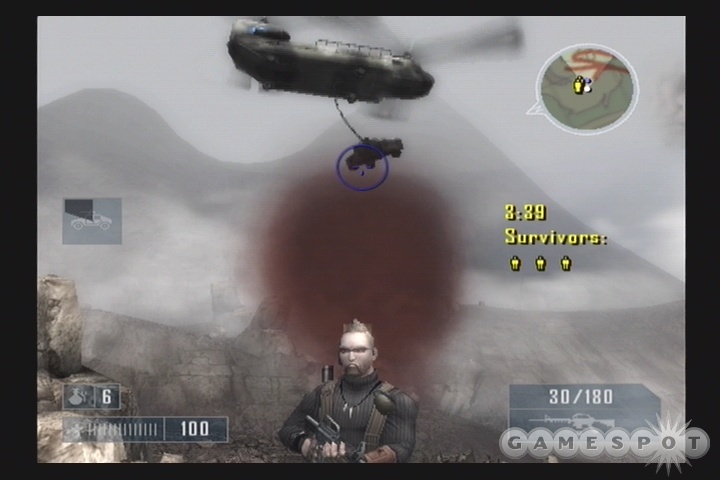
When the area's clear, feel free to honk your horn and get the soldiers in your car before jetting off. If you don't have a vehicle, then there likely isn't one nearby, so feel free to call in for a vehicle drop. Just make sure you choose something with enough room for all of the soldiers, or else you're just wasting your cash. When you have a suitable vehicle, start driving back down the hill. The timer will cease when you reach the end of the dirt road, leaving a seemingly easy drive back to Allied HQ as your only remaining task. Unfortunately, the dirt road to the south of Ichon will be blocked off, and an NK helicopter there will shell you if you attempt to go back across the bridge, so avoid that route and head back to HQ the long way, and you shouldn't have any trouble.
South Korean Contracts
Contract: A Hot Time In Nampo
This is one of those annoying missions that has a chance to severely damage your reputation with a given faction. In this case, it's the Chinese, since Buford wants you to hamper their operations in Korea by running up the price of their gasoline. To this end, he's asking you to destroy three of their fuel depots in Nampo as well as ten of the fuel trucks in the area. There's a lot of destruction going on, and if you're not smart, you can find yourself well in the tank with the Chinese. There are some techniques you can use to soften the faction reputation blow, however.
First off, if you really want the bonus cash, you're going to need either a tank, an APC with a driver-usable cannon on top of it, or an attack helicopter. You may be able to find a Chinese tank in Nampo, so if you really need the extra cash, you can use one of them to take out the fuel depots and the fuel trucks. This is going to be dangerous, though, as you'll be an easy target for rocket-launcher soldiers and other tanks. The attack helicopter option is probably better, but it will require you to have the chopper in your possession before accepting the mission, as there aren't any that are really accessible within the six-minute window given to you by the mission.
In our opinion, it's best to just screw the bonus money and let the timer run down to zero. When this occurs, a few helicopters will fly out from Ichon and start sweeping Nampo, but so long as you haven't been actively aggravating the Chinese in the area, they won't be hostile to you. You lose a bit of bonus cash, but the benefit of saving Chinese faction reputation is well worth it.
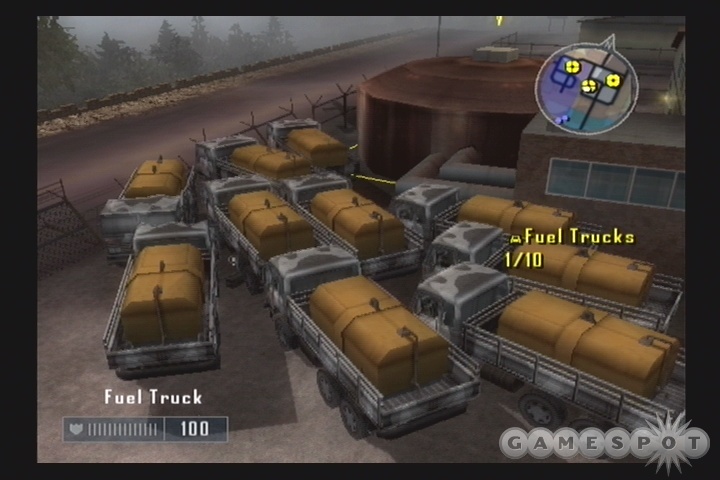
Now, it is possible to destroy the fuel trucks and depots without taking Chinese factional reputation hits, but only if the fuel trucks aren't being driven around. To this end, we found it easiest to just find ten fuel trucks, hijack them, park them all near one of the fuel depots, then blow the whole thing to kingdom come. If there aren't any Chinese soldiers standing nearby, then you shouldn't take a factional reputation hit; they will still view this as a hostile act, though, and will start to open fire on you, forcing you to quickly finish off the remaining fuel depots and get the hell out of dodge before you get killed.
The main area of difficulty here is going to be in finding the ten trucks, as they can become somewhat sparse after you pack an area full of them. The game doesn't have a hard limit of ten, but definitely seems to stop populating the roads after you jack a bunch of them, probably for memory issues. You don't necessarily have to blow all ten of them at once; you can kill any remaining trucks after the one big bang by jacking their drivers, driving them to an isolated spot, and then hitting them with an RPG round or a few grenades. So long as the driver isn't in the truck when it blows, you won't take a faction reputation hit.
After you have all three of the fuel depots and the ten trucks blown away, you'll need to quickly get out of Nampo, since every Chinese there will likely be gunning for you. Alternately, you can just blow the three fuel depots, then let the Chinese kill you, so long as you get the reward for the mission; this will respawn you safely away from the town.
Contract: First Principles
This is another downed-plane-and-pilot-rescue mission, save for the fact that Buford wants you to find the plane and destroy it before rescuing the pilot; he doesn't want the North Koreans sifting through the technology found within it. If you check your map, you'll find that the crash site is located on a dirt path to the northeast of Ichon, so grab a vehicle, load it out with South Korean soldiers, and head out that way.
After fighting or driving past the substantial number of North Korean soldiers on the path, you'll need to blow the plane. It'll require a pair of RPG rounds or some C4, so use whatever resources you have available to you and blow the damn thing; you'll need to do so before Fiona can track down the pilot.
When she does clue you into the location of the pilot, grab one of the North Koren vehicles near the plane and start booking it towards his location; he's being transported in a troop truck to the Black Gate, a high-security North Korean base. If he reaches the gates, he'll be lost to you, so you'll have to catch up with the truck and get him back. The best way to do this is to cut off the truck by parking in front of it, then running up to the driver's side door and jacking it. The pilot seems to automatically get out of the truck when you take control of it, so honk to get him back in, then head back towards Ichon on the double. If you're lucky, you'll be able to get a North Korean disguise on your way back, which will let you avoid any NK troop fire. Just honk your horn when you reach Ichon to lose the disguise and get into the base.
Contract: Master of None
The Jack of Diamonds is going to be your first high-priority target in chapter two of the game. He's somehow managed to build a huge artillery gun with which to bomb Seoul, and it's up to you to take him out. In addition, he's got seven smaller guns that he's using to shell the rest of the map that you're on; those will have to be taken out as well. You're going to be operating on a time limit here; as you approach Ichon, Fiona will pop up a casualty timer on your screen, denoting the carnage back in Seoul. If this meter hits 25,000 dead, then you'll have to try the mission again.

Luckily, Ichon will have just the tool you need to quickly dispatch the seven smaller guns. If you head into the airbase's interior, you'll note a new breed of helicopter, the LHX Light Attack chopper. It only has 500 rounds in its minigun, but it'll be more than able to take out at least the southernmost four of the artillery pieces that are targeted on your minimap; you can also use the R2 button to flip over to air-to-ground missiles if you wish. Don't hover, though; there are a few flak tanks on the ground below you, and they'll easily hit you if you don't move around a bit. You'll also want to keep an ear out for rockets, which make distinct sounds as they approach your chopper; so long as you veer off in one direction after you hear a rocket, they should be easily avoidable.
Unfortunately, the northern three artillery pieces won't be destroyable with your chopper. You might be able to get one of them, actually, but there are too many anti-aircraft trucks and soldiers with Stingers to make this place safe for any kind of aerial incursion. In order to get the artillery pieces here, you'll either need to land and assault their positions with RPG rounds (each piece will require two rockets, meaning that you'll likely have to scrounge for crates to refill your ammo; there should be crates near the eastern and western guns), or find a safe spot to hide while you use special attacks to take them out. The latter option is probably the easier, as there are a ton of troops on the ground. Fighting your way through all of them will be a dicey proposition.
Complicating matters somewhat are the two choppers that will take off and start attacking you around this point in time. You can take them out in one of three ways. One is to commandeer one of the AA missile trucks and blow them; this works well if you manage to get in the truck before the choppers take off, or as they're rising up. When they're already in the air, they'll pelt the car as you get into it, making this a challenge to pull off. The second is to grab one of the Stinger missiles some of the soldiers here will be dropping and use those to pop them from a distance. Thirdly, you can whip out an assault rifle, carbine, or whatever variety of weapon you're using and start shooting at them; they're not so tough that they can take an infinite amount of ammo in their belly before they blow up.
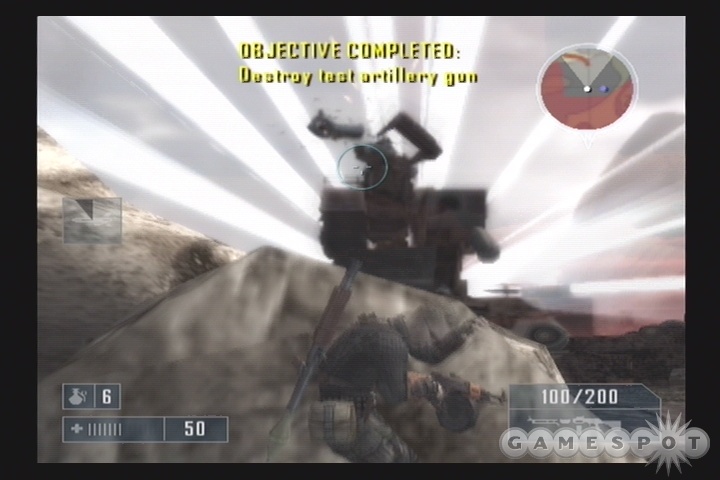
Getting the Jack: After you've cleared the seven artillery pieces, Fiona will clue you in to the location of the Big Gun. Now, if you happened to park your LHX chopper somewhere safe, you can probably return to it and use that to get your way up to the Big Gun. If not, you'll have to shoot your way through a couple of roadblocks on the path leading up to it. When you reach it, you'll earn a Cruise Missile Strike, but you won't be able to actually use it until you take out the radar jammer situated behind the artillery piece. When you do so, you still might want to hold out on using the cruise missile, and instead focus on killing off the rest of the soldiers in the area, as it'll make it easier to subdue the Jack of Diamonds, who'll pop out of the artillery piece after it gets blowed up by the missile.
When you have the Jack down, either verify him or call for an extraction. Before laying down your smoke, though, be absolutely sure the area is clear of RPG-wielding baddies. The chopper can handle normal soldiers, but gets pounded when there are rockets in the air.
After the Jack has been extracted, it's probably safest to just grab one of the North Korean vehicles and hightail it back to Ichon or one of the other faction HQs. If you wish, you can just jump off a cliff or let the troops take you out; you'll pay a thousand bucks to get back to the Allied MASH unit elsewhere on the map.
Chinese Contracts
Contract: Escort Service
It would appear that North Korea is a dangerous place, as yet another officer has become surrounded by NK troops and is in need of extraction. In this case, it'll be a Chinese officer, whom you'll need to locate, pick up, then escort to Haeju.
Start by driving south from the Chinese HQ. If you stop in Nampo, you should be able to track down an APC circling the town there, if you're in the mood for something a bit more hearty than the Scout you're likely using. You'll likely appreciate its firepower, too, since there's a Tank or APC guarding the southern end of the nearby bridge; it'll be tough to speed past it in a scout, due to the placement of the burning rubble, so it's best to just blow it with an APC rocket of your own, or hijack it.
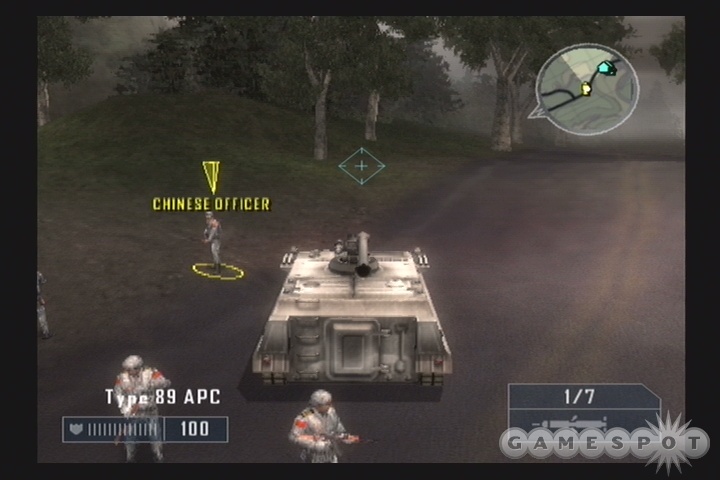
When you come across the officer, honk your horn to get him in your car before moving on to the south. You'll soon come to the bonus objective; a set of three tents inside a larger NK base. Destroy them all if you want the bonus money; otherwise, just speed through the base and get on your way to Haeju. You'll have more obstacles along the road, consisting of a few RPG-wielding soldiers and more Scouts/APCs, but it's nothing you shouldn't be able to handle.
Contract: Persuasion
Now, since you took a mission from the South Koreans that probably dented your respect with the Chinese, it's time for a mission from the Chinese that'll absolutely trash your rep with the South Koreans. In Persuasion, you'll be tasked with defending the Propaganda Village from a wave of incoming South Korean troops. There's no way to finesse the damage here; you're going to have no choice but to kill a whole bunch of South Koreans. This isn't too big of a deal, though: since you already finished the South Korean missions for this chapter, you can feel free to save their missions for last in the next chapter, which will let you kill them without remorse until you're forced to bribe their officer to regain their esteem.
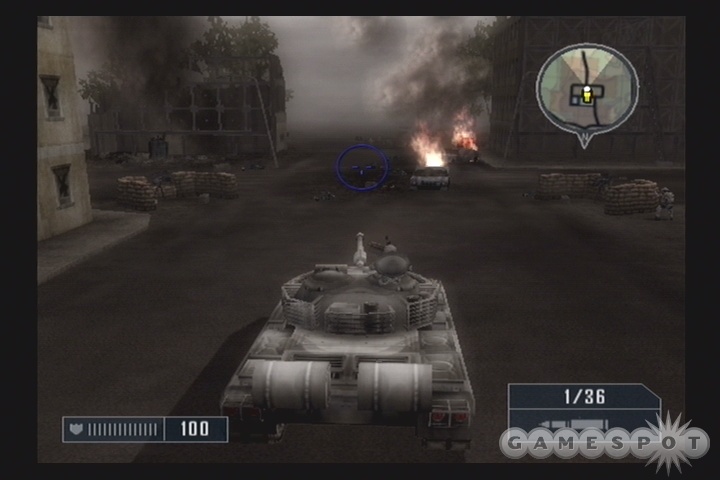
When you reach the Propaganda Village, you'll have to defend six Chinese officers and ensure that the South Koreans don't overrun their position. Luckily, the South Koreans will pretty much exclusively come from the south, giving you a single vector to cover. You can approach this problem in a number of ways, but we found the best to be hijacking the Type 80 tank near the officers and just blasting the Scout vehicles as they approach the town. You'll have to be somewhat careful about the rocket-turret Scouts, but with a little luck, you should be able to take all of the Scouts out without getting blown up yourself. Be warned, though; after Fiona radios in and lets you know that the South Koreans are considering pulling out, they'll actually ramp up their attack. If you blow enough scouts, the rubble from the wreckage will block off the rest of the bad guys from coming in, letting you kill them from a distance.
Towards the end of the battle, you'll be tasked with bringing down an APC. It'll appear from the northwestern road to town, so blow it with any explosives you have or tank shells to end the contract.
Contract: Knock Knock In order to track down and verify the King of Diamonds, you'll have to penetrate his artillery base, destroy the guns that the Chinese have marked for you, then flush out the King and tag him. This mission is a bit easier than the one you did for the Jack, so don't sweat it too much; it would be a wise idea to have an RPG at your side, though.
If you hop into a Chinese vehicle and start heading south, you'll notice two things. The first is the random scattering of artillery shells that are coming down. Most of these should land well off the road, so you won't need to worry too much about them. The second is the fact that South Korean forces will now likely fire on you if you're disguised as Chinese, since the two factions are now more or less at war. You might want to honk your horn as you're heading through Nampo so that everyone knows you're neutral.
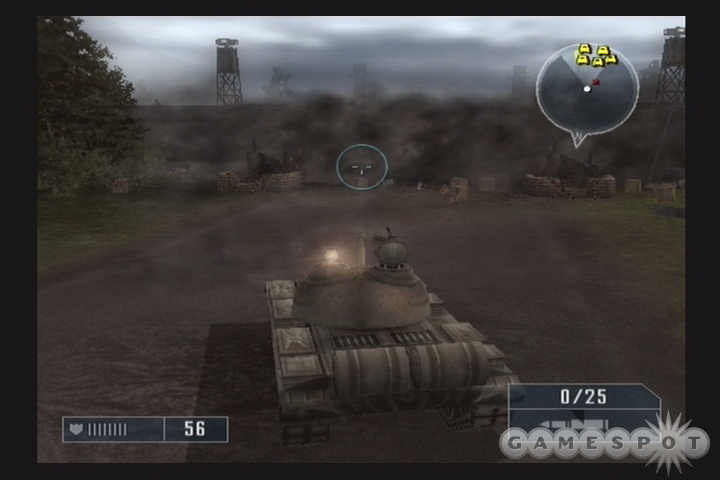
When you reach the turnoff leading to the base (it's best to approach it from the north, via the paved road), you'll come to a roadblock, where you can jack a T-54 tank. This will be useful because it can either get you inside the gate of the artillery base (although the officer there will spot you, causing you to be fired upon), or its shells can be used to destroy the gate from a distance away. It's probably best to just go for the latter option, since it'll keep you safe out of harm's way. The gate itself can take a lot of rounds, but you can probably take it out more quickly by firing on the walls to either side. Don't neglect to dispatch the alarm towers on either side of the gate, on the inside of the base, to lessen the flow of soldiers when you get inside.
After the gate comes down, your first goal should be to blow the flak tank inside the walls; if you're still a way back from the entrance, it probably won't fire on you. Inside, there'll also be a signal jammer and a couple of anti-air vehicles. If you still have the tank in your possession, you can also use it to blow away the two northernmost artillery pieces on the hill above the lower portion of the base, as well as the gate leading up that way. If not, you may have to destroy the first jammer and either C4 the gate or call in some kind of airstrike to take it down. If worst comes to worst, you can also try jacking a North Korean vehicle from somewhere (perhaps even the signals truck), and using that to get through the gate.
On the southern side of the base, you'll have to take out three more of the artillery guns. This can be difficult to do if you're running low on health and ammo; luckily for you, there's plenty of both beneath the metal helipads here, so restock your RPG, if you're using one, then go to town on the guns. If you absolutely have to, you can use airstrikes to destroy the guns, or call in for a supply drop for more C4. If you go for the latter option, you'll need to be sure that there aren't any more AA vehicles active nearby.
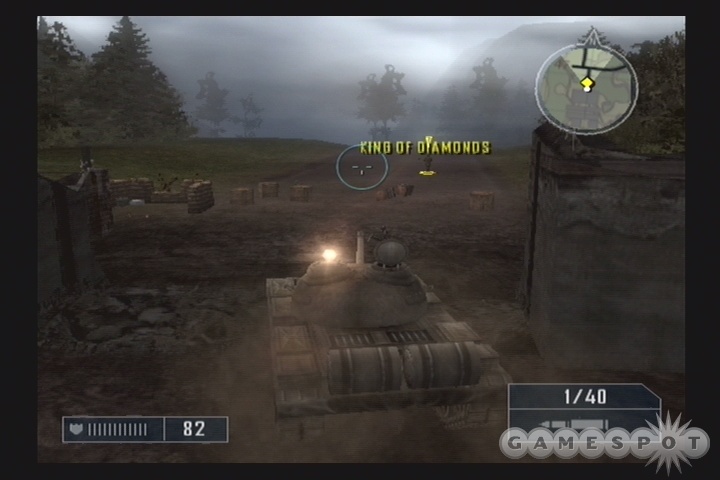
When all of the guns are out of the way, the King will appear in a tank in the northern end of the base. When this is either destroyed or hijacked, he'll pop out and start escaping on foot. Drive out in front of him, knock him when he runs past, then subdue and call for extraction to end the contract.
Mafia Contracts
Contract: Playing The Odds
In Playing the Odds, the Mafia will ask you to ensure that a South Korean attack on a North Korean base goes badly - real badly. Luckily, you can pull this off without taking any South Korean factional reputation hits, if you play your cards right. If you're unconcerned with this, then feel free to just blow through all of the South Korean forces.
The first thing you'll want to do is head towards the man marked in turquoise on your map - this is a Chinese artillery officer, whom you can bribe to gain access to a couple of Artillery Barrages; these will cost you 50,000 bucks, but it'll be well worth it in terms of pure destructive power. The officer is being assailed by NK troops in North Pyongyang, so rescue him, pay him the money, then head to the NK base that the South Koreans are attacking. You can enter through Sariwon, if you wish, but keep in mind that the whole place is considered to be South Korean territory, meaning that they'll attack you unless you're disguised as a South Korean. This is really only a problem on the way in to the base; in the actual combat zone, they'll be more focused on the NK base defenders.
Now, when you do reach the base, your goal will be to reduce the South Korean troop strength meter to zero. We'll go ahead and posit an ancillary goal: do this without reducing your faction reputation with them to zero, as well. The circle on your map denotes the main concentration of South Korean vehicles, so head there and get to work.
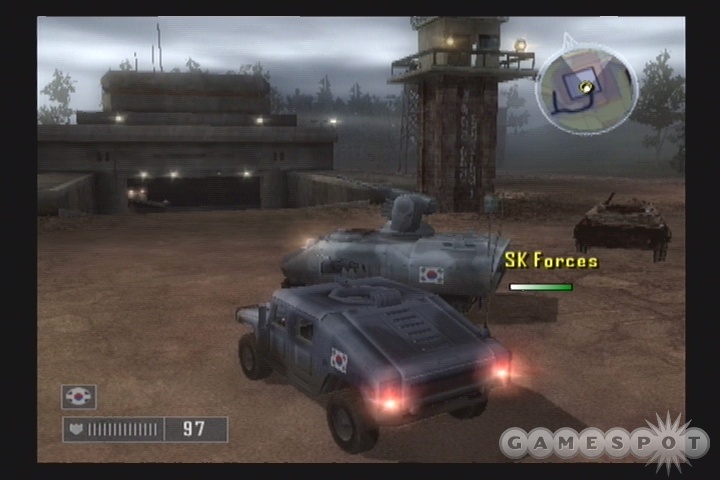
The biggest drop in the troop strength meter will come from the destruction of South Korean vehicles. If you drop down an artillery barrage in the middle of a bunch of said vehicles, you'll likely destroy the whole bunch, but unfortunately the initial concentration is a bit thin. You'll also have to be careful of the fire from the South Korean APCs, which have a rapid-fire cannon that can blow you to bits with just a few hits. Luckily, they're easy to hijack, and your first goal should be to jack one and take control.
Now, assuming you run out of artillery barrages and still have a good amount of the meter left, you're going to have some options still available to you. The first is to jack the South Korean vehicles, drive them away from the main battlefield a bit, and then blow them up; this will take care of some of the meter without having the South Koreans hate you too much. You could also try to jack a North Korean tank, drive it back to where the South Koreans are, then get out and hope one of the NK troopers gets in and starts shelling the South Korean forces. You can also try to use some of your other airstrike abilities, if you're willing to pay for them, but these do seem to cause the South Koreans to hate you a bit, poor bastards. Hopefully the NK forces will cause a bit of damage to them, making your job a bit easier.
If you want to earn back a bit of reputation with the South Koreans after you complete this mission, stick around in the base and start killing NK troops in full view of the South Korean forces. Each kill should earn you a bit more rep. Again, though, your South Korean meter will likely be trashed in the next chapter, so you shouldn't worry about this too much.
Contract: Omerta
This is a straight-up assassination mission, albeit one in which you're going to have to track down and kill four separate targets. You're definitely going to want to take Josef up on his offer to do this quietly, though, as your targets are members of the various factions, and you don't want to risk getting too deep in a reputation hole with these guys. That said, if you don't particularly care about faction reputations, then there are easier ways to take out your targets than by using the sniper rifle.
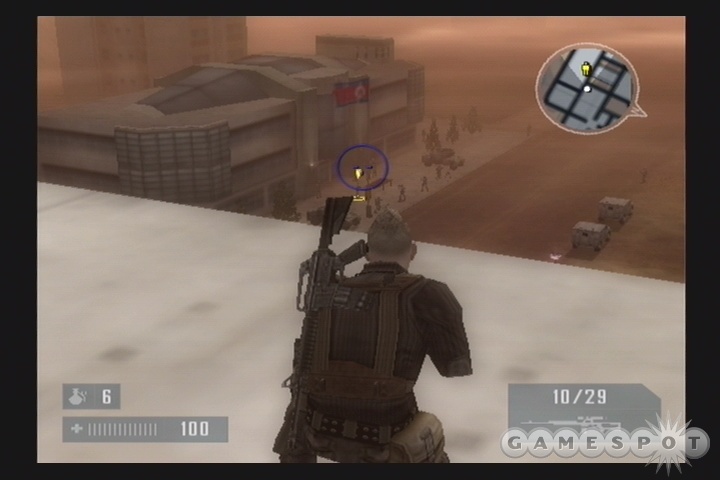
The first target is also the easiest. The Allied officer is giving a speech to reporters in Pyongyang, giving you full sightlines on him. If you want to avoid getting spotted by Allied troops, try shooting him from as far away as you can possibly get; the cherry blossoms to the northwest or northeast of his position should be ideal. You might only be able to see an outline of the officer, but that's all you really need to see when you have a sniper rifle. Just make sure that there aren't any Allied Scouts driving past your location when you pull the trigger. Note that the 25,000 dollar penalty for killing an Allied soldier is apparently unavoidable, even if you do manage to avoid taking a factional reputation hit.
Now, the North Korean prisoner and the South Korean officer will be tied together somewhat; this is going to be the most difficult part of this whole escapade. The NK prisoner will appear on your map first, jetting to Downtown Pyongyang in the South Korean vehicle. If you're intent on sniping him from a distance, you'll likely have to get past him and set up shop near the South Korean officer, who's preparing to board a big UH-60 chopper. Now, if you manage to snipe the NK prisoner after he gets out of his car, the South Korean officer will panic, and the helicopter will take off without him, allowing you to snipe him from a distance. In truth, though, this is a lot, lot tougher than it sounds, mostly due to the fact that the helicopter area is crawling with South Korean troops that will be more than happy to take you down if you get too close. That, and the fact that the whole encounter moves rather quickly; if you can't get to the area before the NK prisoner gets out of his escort car, he and the South Korean officer will get on the helicopter and take off, leaving you to quickly fail the mission when they get out of tracking range.
The above sniper scenario is really the best-case situation. If you're just looking to kill the two targets, then there are some obvious solutions, among the easiest of which is to just wait until the NK prisoner gets out of his car, then call down a Surgical Strike directly on top of the helicopter. That'll almost assuredly take out both targets, but will also tank your South Korean faction reputation. Alternately, you can grab an LHX Light Attack chopper from Ichon and use that to take down the Allied officer, then bring it to bear on the NK prisoner's escort car while it's still in transit before finishing off the South Korean. Lastly, if you have access to a Stinger (as with the Anti-Air Rocket Drop), you can position yourself to the north of the South Korean helicopter, then blast it as it takes off. None of these are perfect solutions, as each will likely tank your South Korean reputation, but after the fifth or tenth re-try of this mission, they'll look a lot more palatable.
Last up is the Chinese tank officer. This guy can be tricky to snipe, as he'll be in the turret of a tank that roams the streets. If you can monitor his route a bit and wait for him to double back on himself, then you should be able to blast him while he's moving in a straight line.
Contract: ... It's Who You Know
The contract for the Queen of Diamonds will come to you in a roundabout fashion; Sergei will let you know about a reporter who reportedly has tabs on the location of the Queen, and offers to set you up with said reporter in exchange for rubbing him out. The reporter, that is; Sergei seems convinced that he's actually a spy for another faction.
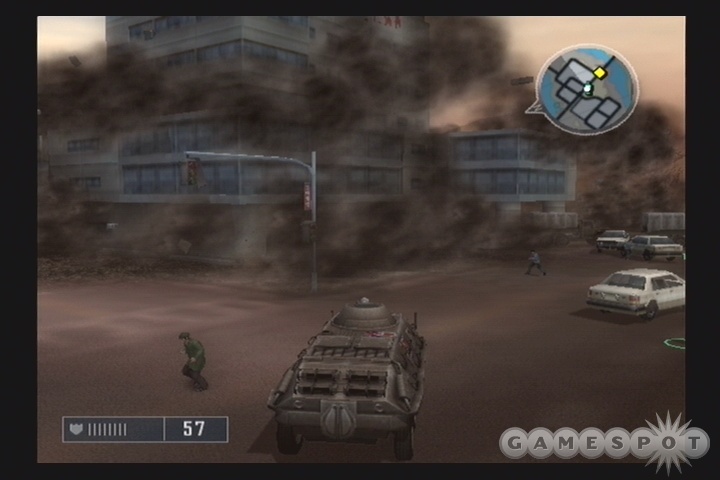
In order to start along the path towards the Queen, pick up the journalist. He's on the road between North Pyongyang and the Pyongyang Airport, in the midst of a rather large firefight, so just reach his position, talk to him, then grab a vehicle and honk your horn to get him into it. He'll start giving you map coordinates to go to, but before long, you'll be back in Downtown Pyongyang, where you'll find that the Queen has been using a hospital as cover for his arms running. When he spots you coming, though, he'll blow the entire building rather than give you evidence of his malignant plotting. It's at this point that the journalist will leave your vehicle. If you want the bonus cash, you can either run him down or get out of the car to kill him, but this will get you the normal faction reputation drop that comes from killing a journalist, so unless you're really desperate for cash, just leave him be.
The Queen will escape from the hospital, and since the street is mostly blocked with vehicles, you won't be able to follow him immediately. When the building is completely demolished, though, you should find a small passage near the rubble. If you need any health or ammo, grab some from the crate near the building, then proceed on down to where the Queen winds up.
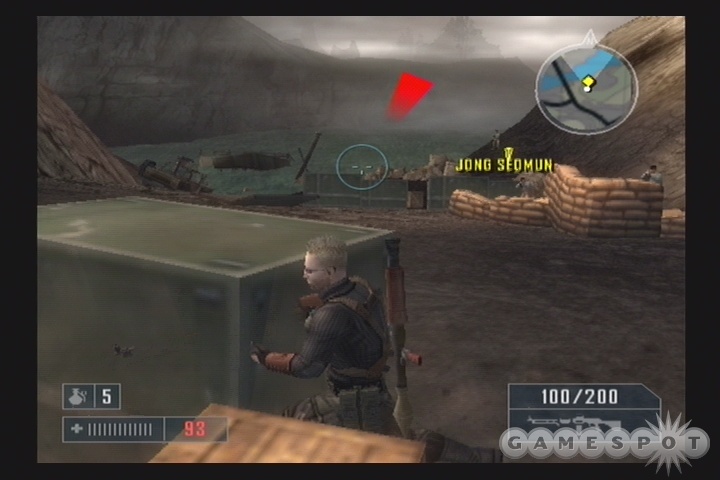
Of course, no face card is going down without a fight, and the Queen is no exception. Getting to him and subduing him isn't a huge problem, assuming you're near full health; just run down the small valley, get behind the turret that the Queen is manning, then stun him and knock him out. You'll take some fire, sure, but there are two crates nearby, as well as one closer to the mouth of the canyon, and one on the boat that's floating in the river.
The main obstacle to actually extracting the Queen is going to be this boat, since it will continually spit out fresh sailors, of the assault-rifle-toting variety. If you want to get a clear path out of the valley, you'll probably want to sink the boat, which you can do with either some C4 charges, or by calling in some kind of airstrike. Just make sure it's a localized strike, such as a Surgical Strike or Gunship Support instead of something huge like Cluster Bombs or Artillery Bombardment, which will likely kill the Queen at the same time as they sink the ship.
When the ship's out of the picture, the sailors will stop spawning, which should let you clear out the rest of the valley and drag the Queen back out to the road, which is the closest place with a clear landing zone for the extraction chopper.
Finding the Diamonds
Two of Diamonds: The Two is located south of the Allied HQ, at the far end of the paved road there, near where you originally got dropped off at the beginning of the game. The path to him is rather well-populated though, and his area is patrolled by an AA vehicle, a couple of flak tanks, and a T-54, so your best bet is to get through it all in a North Korean vehicle and quickly subdue him before jacking the tank and eliminating any opposition nearby.
Three of Diamonds: The Three is almost impossible to capture alive. If you want to try, head east of the Propaganda Village, near where there's a "40" mark on your zoomed in map. The Three is situated immediately next to a bunker that will continually spit out both T-54's and flak tanks, making this area difficult to reach without a North Korean vehicle at your disposal, and that will make it difficult to get past the Allied troopers assaulting the position, so you're kind of screwed either way. He's much easier to just kill and verify before leaving; getting him out alive will almost certainly entail bringing in a Scout or jeep vehicle and bringing his unconscious body out in that.
Four of Diamonds: The Four is on a little hill to the southwest of the Ichon airport, in a little zone boxed in on all sides by paved roads, directly on top of the '50' marker on your zoomed-in map. It's probably best to approach him on foot, as he and a lot of the soldiers nearby pack RPGs, thus making a vehicular approach somewhat risky. As you approach his position, the helicopter nearby will take off, giving you an aerial target. It's a light model of aircraft, though, and can be shot down with your carbine or an assault rifle if you don't have anything else at your disposal.
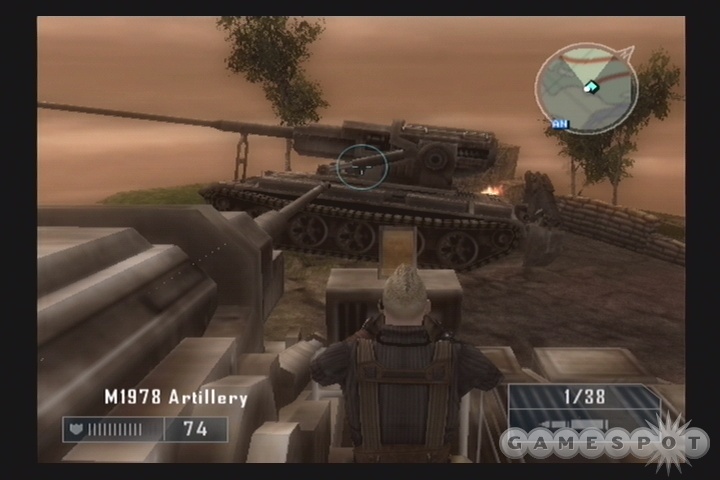
Five of Diamonds: The Five of Diamonds is located at the end of the dirt road leading northeast out of East Pyongyang, to the west of the NK Fortress. Getting to him is relatively simple, since the artillery piece overlooking the road seems to be unmanned. He's also lightly defended, with only a couple of guards nearby, so buck him down before extracting him. You'll need to drag him down the hill a bit before you can find an adequate landing site for the evac chopper.
Six of Diamonds: The Six and Seven cards are close to each other, both habitating rough offshoots of the road to the Black Gate fortress northeast of Ichon. Six is a bit tougher to get to than seven, though, as he's situated next to a bunker that will continually spawn T-54 tanks; yikes! If you can sneak up to him in a North Korean vehicle, then you shouldn't have a problem subduing him; getting him onto a chopper in one piece will be a bit more work. There's enough room on his little plateau to land the evac chopper, but you'll want to be sure there aren't any tanks coming out of the bunker, or the trip could be over pretty quickly. We preferred to just kill him and verify.
Seven of Diamonds: El Siete is off to the east of Ichon, along the path leading to the Black Gate and the NK Fortress to the northwest of the airport. If you follow the paved road, his ticket will pop up, and you'll be able to turn onto an unmarked side path (you'll spot some large rocks on the road near the entrance to same). Seven is relatively undefended, so you shouldn't have any problems going in and knocking him out. Finding an adequate landing site for the chopper is another thing; the closest applicable place may be the road nearby, and that's crawling with NK troops. It might be able to land there, due to the minigun protection; otherwise, you might want to just load him up in a vehicle and drive him back to Ichon.
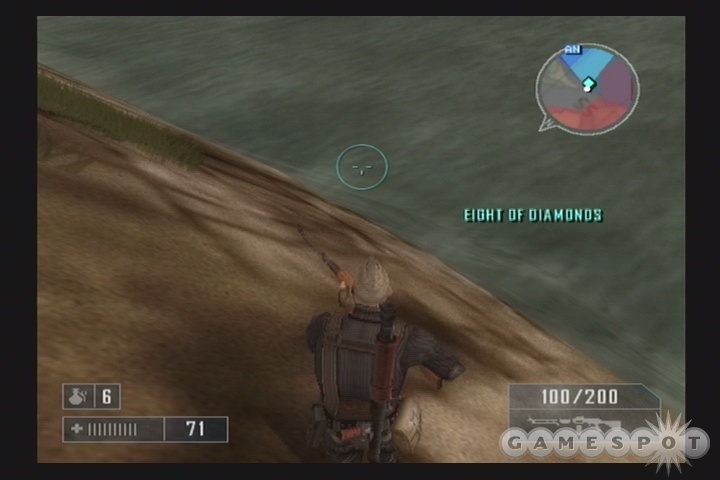
Eight of Diamonds: As the email indicates, the Eight is west of Nampo. Even though the map doesn't show there being much land on that side of that town, if you head a bit north of town until you find the train tracks, then follow those as far west as they go, you'll come to the Eight's little stronghold. It's best to find a North Korean vehicle for this little trip, as there's both a tank and a stationary artillery gun watching over the entrance.
Nine of Diamonds: The Nine is located in the hills to the northwest of Haeju. If you take the dirt road heading west from that town, near the end of the train tracks, you should be able to bypass the Chinese/NK firefight; eventually, you'll come across a T-54 tank in the shrubs that'll try to blow you to bits. Getting to the Nine will be a lot easier if you just jack this thing and take it up to his location; he's in the square between the 35 and 36 markers. We'll be honest and say that the Nine is much, much easier to kill than to capture alive, mostly because he's standing next to a few FROG-7's which, if accidentally detonated, will almost certainly kill him. Taking him alive will involve somehow getting past three of the flak tanks which can cause such problems for soldiers on foot, but if you have a fully-loaded RPG, you might be able to clear them out. Like we said, it's probably best to just blast the FROGs, kill the Nine, get a picture of his body, then get the heck out of dodge.
Ten Of Diamonds: Actually managing to capture the Ten and get him out of his area alive is going to be a monumental task, and one that's almost certainly not going to be worth the effort. He's in the hills to the northwest of Haeju, near the 45 marker on your zoomed in map, but he's got friends. Lots of friends. By our count, there are at least three T-54 tanks in his little area, with more coming out of the tank bunker nearby, a signal jammer, an AA vehicle, a bunch of FROG-7's, and a couple of helicopters, of the large variety, meaning that they won't be shootable with your carbine or machinegun or whatever other automatic weapon that you're using.
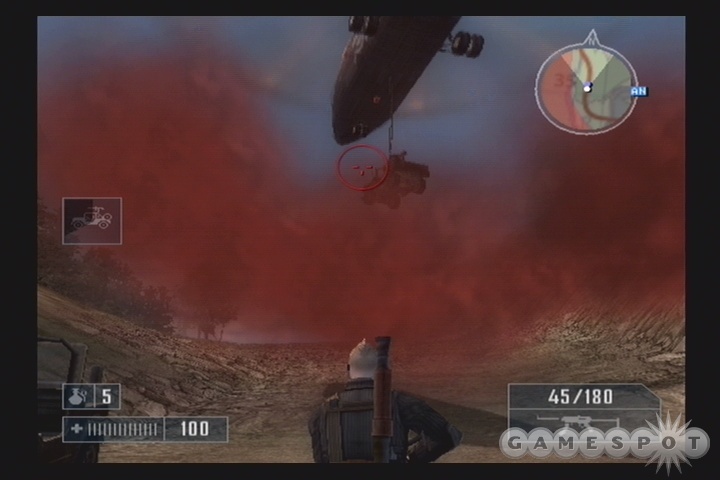
Now, obviously enough, actually getting to the Ten will entail using a North Korean vehicle to disguise yourself and penetrate to the Ten's position; there shouldn't be any officers close to him. When you do reach him, you'll find that he's on a small hill overlooking the little base he's built up for him. You'll have to decide whether or not you want to capture him or just kill him at this point; the far preferable option is to just kill him, verify, then try to cause as much damage to the base to justify the 25,000 dollars you're giving up by killing him. It shouldn't be hard to do, either; a single RPG round on one of the FROG-7's should take them all out, along with the AA truck, making that cash back and more. If you can jack one of the T-54s, you might be able to take down a few more of the artillery pieces as well, making more bank.
Actually getting the Ten out alive will be exponentially more difficult. A theoretically workable situation would involve parking two Sungri Scouts at the bottom of the cliff near the Ten, along the dirt road to the southeast. You'd need to have one of these as an approach car, which you would use to disguise yourself and get close to Ten before subduing him and picking him up. If you got that far without getting killed, you might be able to slide down the cliff without getting killed, then load his body into the second Scout and driving off to some theoretically safe point. The only other real way to get this done would involve taking down both of the choppers - theoretically possible, but extremely difficult - then getting up to the base, destroying the tank bunker with a Bunker Buster, then destroying the tanks and the other vehicles and soldiers before subduing the Ten. Considering that a Bunker Buster costs over a quarter of a million dollars, and the Ten has a high chance to die anyway during all of this, you're better off just killing him and eating the 25,000 dollar penalty.
Boss Contract: The Ace of Diamonds
The Ace of Diamonds, General Chang, has developed a supergun capable of firing radioactive shells over most of Asia. He also has a Bird of Prey that can fire while cloaked! He must be stopped! Your task is to destroy the supergun before he can use it to bring harm to innocents, then verify him. Your task is made a bit more complex by the presence of radioactivity over much of Kang's island; in order to bypass these areas, you'll need to be inside a shielded vehicle, which for our purposes include both Tanks and APCs.
For that reason, the first thing you should do is order yourself a North Korean APC from the Merchant of Menace shop; the BMP APC is likely the best choice, since you can man the turret yourself, but anything you have available to you is preferred to travelling on foot, mostly because of all the troops patrolling the jungle. If you don't have enough cash for an APC, well, you must've been spending like a madman, because they're fairly cheap. If that is the case, though, you'll have to jack something. There are a few bases on the northeastern island, and if you visit one of them, you're bound to come across an APC or a tank. Actually getting away with one will be difficult, as most of the bases have plenty of RPG troopers around.
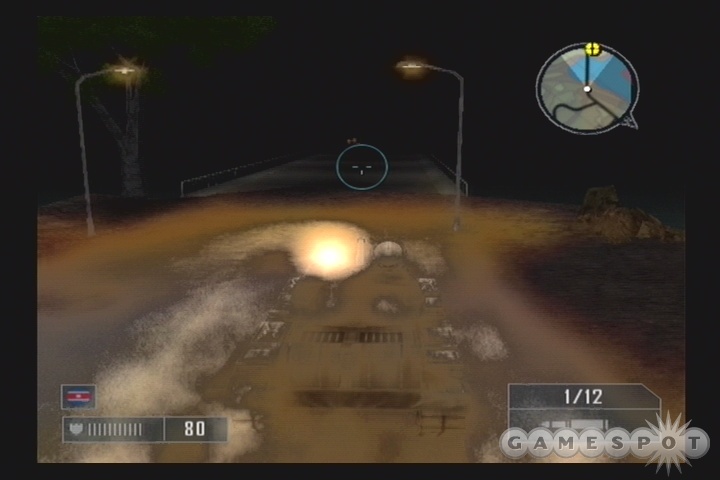
When you have some kind of suitable vehicle, head towards the bridge in the southwestern corner of the first island. If you're disguised, you're going to have to be careful when you bypass the buildings on your map, as most of them have officers at the door. If worst comes to worst, and the NK troops get wise to you, then running to the bridge itself should get you an opportunity to re-earn your disguise, as most of the NK troops entering the radiation zone will be killed, leaving you completely unobserved. If you feel like grabbing one of the empty vehicles here, then make sure you're at full health before switching, as you can only survive a few seconds before keeling over. Note that if you travel through in a jeep, it might appear as though you're not taking damage, but you actually are; the game just doesn't show it, since the vehicle health meter is on screen.
Destroying the Supergun: After crossing the bridge, you'll come under the influence of the Supergun's signals jammer, meaning that you won't be able to use a Bunker Buster to destroy it. Fortunately, Kang manage to build a prototype Supergun right next to the real one, which is fully capable of aiming at and destroying the real gun, letting you blow it without getting too close and thus getting fried by radiation. That's... well, that's awfully convenient, to put it mildly. Don't look a gift horse in the mouth, though. Instead, head around to the western end of the southern island to find the dirt road leading up to the prototype gun.
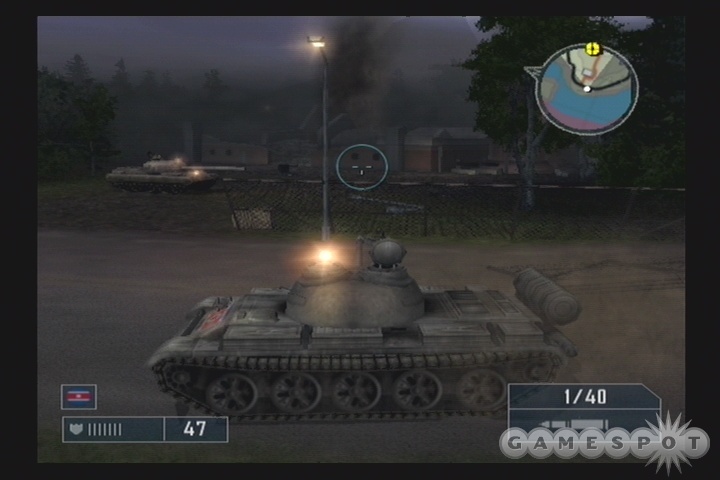
There is going to be a little base at the bottom of the road, replete with a tank, an officer to spot your disguise, and a bunch of soldiers. If you want to take it out, pause around the corner from the entrance and use one of your Carpet Bombing special attacks. That should pretty much destroy the building and any soft targets, but the tank might still be around; you can either jack it or blow it up manually, as you please, or just drive by it if you manage to reestablish your North Korean disguise. There's another tank or three on the path leading up to the prototype gun, so it'll probably be worth your while to either call in for a Sungri Scout delivery, or jack an NK vehicle on the road. There isn't any radiation near the prototype gun, so a jeep will do you just fine.
When you do reach the prototype gun, head inside via the doorway on the side and use it to blow up the Supergun across the way. This will prompt Fiona to tell you that Chang is preparing for his "final push." To where? The water? He's on a damn island. Anyway, he'll hole up in the base at the end of the road leading to the supergun, on the far side of the island, so that'll be your next target.
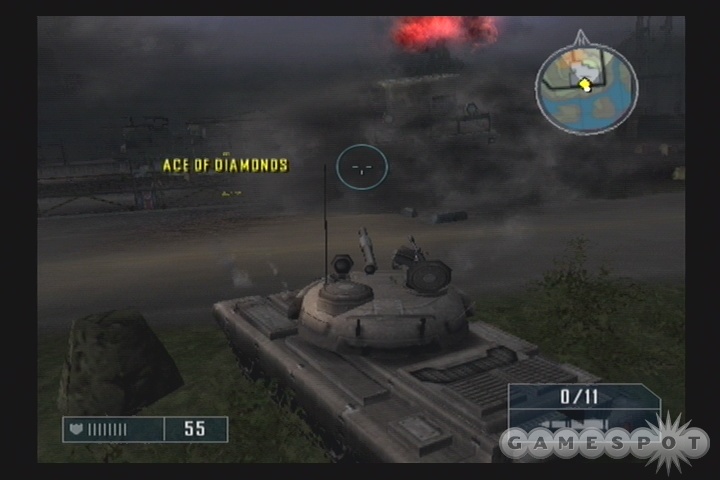
Obviously enough, killing Chang is a lot easier than capturing him, mostly because there are a couple of new-model T-62 tanks patrolling near where he is. You should still have plenty of special attack options available to you, so calling for a carpeting bombing or an artillery barrage will likely take down the Ace and most of his defenses, letting you verify him and end the mission. If you're dead set on getting him alive, though, you'll have to go in hard. The best way to proceed is to jack the T-62 near the entrance, then use that to start blowing away the many buildings in the area, most of which will continually spawn in troops until they're destroyed. There are also a couple of flak tanks and at least one more T-62 nearby, so those will need to be taken out as well. Or, you could try to clear out the entry area, then subdue the Ace and get him into a car before driving out to somewhere safe before calling for an extraction. Again, though, killing is the better option here.
Chapter Three: The Hearts
After you complete the Ace of Diamonds mission, you'll be dropped off in a more northern part of North Korea, near the border to China. This is the second map of the game; all of the normal factions have new HQ's here, but you'll need to get your bearings before you can be really effective. Feel free to drive around for a bit before taking your new missions. You can also return to the southern map by talking to the soldier in the Allied MASH; this will let you collect any bounty items that you missed out on earlier.
Allied Missions
Contract: Inspect and Verify
Well, it would appear that weapons inspectors are in the area, trying to confirm a few sites that are suspected of being use in constructing nuclear weapons. Your mission is to escort these inspectors to the sites, protect them, then get them back home in one piece. You have four weapons inspectors to escort, but only one needs to actually make it back home, giving you a bit of leeway in your assignment.
The first thing you'll notice here is that you can choose between either a UH-60 or an APC. The APC is the smarter choice, since the inspectors will have to leave the vehicle, and landing a chopper at some of these locations will be rather tricky. The APC is also more heavily armed, packing as it does a heavy-duty turret that fires explosive shells.

Begin by taking the inspectors to the northernmost of the sites, the 5 MW reactor. If you're concerned about getting shot up, then you can leave the vehicle with the L1 button (which will force the inspectors to stay inside), then run up and use your RPG to take out any enemy vehicles. When you're ready to get a bit closer, use the APC's cannon to destroy the soldiers in the area, then hit L2 to let the inspectors out while you remain inside the APC and man the gun. If you're really paranoid about protecting these guys, then use the cannons to destroy all of the buildings near the unloading zone, just to be sure that no NK troopers come out while the inspectors are inspecting. When you do send them out, they'll need around 15 seconds to complete their little tour, so let them finish, then get them back in the APC by honking and head south.
Next up is the 50 MW Reactor. The same process applies; approach from a distance, blow the buildings up, then proceed in slowly, destroying any vehicles first before finishing off the soldiers around the area. When you can sit in the unloading circle and aren't taking any fire, let the inspectors out. The same routine works for the final site, save for the fact that there are a couple of helicopters up that way. You should be able to take out the first one while it's still on the pad, but watch your radar for the second one. If it hovers in midair, it should be easy pickings for your APC cannon, but you may have to back up a bit if it flies above its maximum arc.
Contract: Reactor Retrieval
Apparently, some of the weapons inspectors have been kidnapped by the North Koreans, and they're holding them at one of the sites which you recently passed through. Your mission is to retrieve them from the base, which is heavily fortified with soldiers and armor, and get them to an Allied outpost nearby. You can also earn a bonus for not letting any of the inspectors die; the mission is failed if all of them pass away, but keeping them all alive will give you an extra 75k. We'll be forthcoming and say that rescuing even one of the three inspectors is going to be a task, so don't feel the need to restart the mission if one of them gets capped. You've got three in all, so getting at least one out should be your goal.
After the mission starts, hop into the UH-60 near the base and jet over to the hostages lickity-split. Don't get too close, though, as there are plenty of flak tanks in the area. Also, when you approach the base, the guards there will start killing off the hostages. If you're really intent on rescuing them all, then you'll need to land well before the weapons site, grab a jeep from the road, or have one delivered. When you're in a vehicle, you can charge up the road to the base, bust through the initial set of defenses, ditch the car, then kill the two guards (marked in turquoise) before they kill the hostages. You'll need to kill these guards whether or not you want all of the hostages, as they'll eventually kill all of the inspectors, forcing you to replay the mission; your desire for the bonus cash will only determine your boldness in getting in there. When both of the guards are dead, the hostages are more or less safe, as the rest of the troops in the area won't actively attack them until you attempt to extract them.
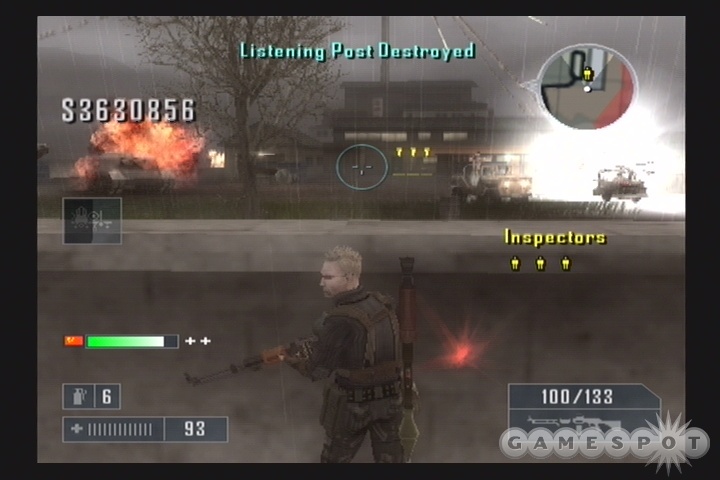
When the guards are dead, start running towards the western wall here and jump over it; you may need to find a small crack in it before you can clear it completely, but it should give you pretty good cover from the fire of the troopers here, and will let you activate your Tank Buster special attack. Try to aim this somewhere in the vicinity of the hostages; it'll seek out and destroy any nearby vehicles, and since they're in their own little area, they should be more or less ok. Luckily, there aren't any infinite-spawning bunkers around here, so if you can get rid of the western vehicles, you should be pretty much free and clear of vehicular interference. You may want to invest in another Tank Buster for the eastern reach of the base, but your RPG will likely be just as good a choice.
Before you attempt to pick up the inspectors, do a run-through of the area and kill off any more NK troops. When you're ready to clear out, you'll need to find a vehicle that can fit all of the inspectors. If you only have one or two to get out, then a Sungri Scout will do the job; otherwise, you're going to need one of the troop trucks, or an APC, if you can find one. Regardless, you're going to need something to load up the inspectors with, so find or get a car delivered, then start heading towards the drop point. There's a roadblock on the path, complete with an officer and a flak tank, so be sure your ride is capable of taking a bit of a beating, or you'll be a flaming pile of junk before you can reach the base. Getting past the roadblock isn't the end of your adventure, either, as the drop point will be the site of a melee between the Allies and North Korean forces. Let the Allied APC beat up on the NK troops for a few seconds before charging into the base; be sure to honk at the Allies if your disguise is up, to prevent them from destroying you.
Mafia Missions
Contract: In the Neighborhood
Sergei is convinced that the South Koreans are interested in taking him and his operations out of the picture, and will thus ask you to help him with a little "problem." The SK forces are taking up a position in the NK Village to the northeast of Yongbyon, where Sergei's set up, and he wants you to take out five of their little hideouts.
As you make your way to the NK Village, you'll get an updated bonus contract, which is somewhat ancillary to the main objectives here. It appears that the Allies "lost their way" near a temple in the area - kind of hard to do with modern GPS, but hey - and Sergei wants you to take it and deliver it to the Mafia garage near his HQ. Obviously enough, this M1 is intended to let you have a bit of an easier time dealing with the hideouts in the village. You'll only have five or six minutes to use it before the Allies send out an aircraft, presumably to destroy it, but this should be enough time to demolish the village, or at least the five buildings that you need to destroy.
Now, there are three villages on the exterior rim of the village that can be destroyed rather easily, but it's pretty difficult to do so without either getting shot to hell by the South Koreans or taking a massive hit to your South Korean factional reputation. After the Mafia and Chinese missions from the Diamond suite of cards, though, the South Koreans probably hate you pretty badly as it is, so you can't really damage your reputation with them more than it already has been. So, you're not going to hurt anything by just killing as many of them as you can. If, on the other hand, the SK forces still have some shred of respect for you, you might want to try getting to the rear of the buildings and using C4 to blow them away, and hope that none of the South Korean troops get caught in the blast.
The main problem here will be the two buildings near the signals jammer; these are populated by a bunch of humvees with TOW launchers atop them, so if you drive your M1 Abrams up the ramp there, it'll probably be destroyed in short order. You'll want to either approach on foot and use your rocket launcher to thin the crowd a bit, or just take down the jammer, run away, then call down a Surgical Strike on the area from a distance away.
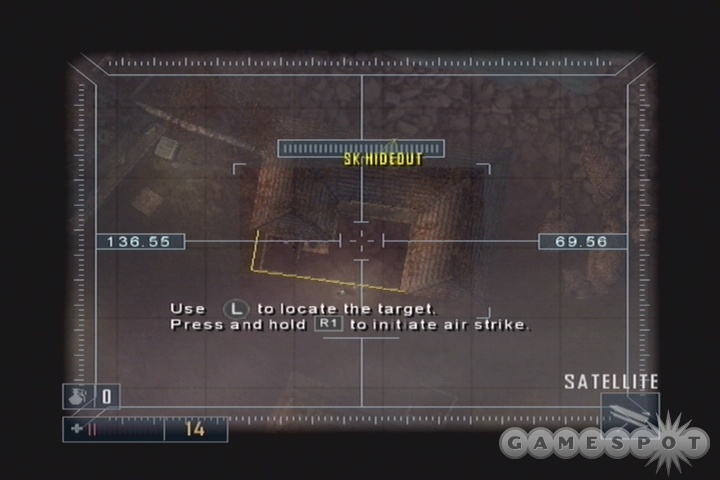
If the South Koreans are hostile to you, then you might as well just head straight for the jammer and take it out. This will let you hunker down behind some cover and use your Surgical Strikes to take out the rest of the buildings. If you find yourself running low on health, you can get into trouble pretty quickly, as there aren't a lot of medical supplies in the area. In this instance, you'll just want to take out all of the buildings as quickly as you can; the mission ends in this instance, so it won't make much of a difference whether or not you die afterwards. If you can get the M1 back to Sergei's place, he'll give you the 20,000 dollar bonus, as well as a selling price of 35k or so. Note that you can just grab it and return it without ever entering the South Korean village, if you wish, then return to the village to fulfill the main contract objectives.
Contract: 106 Miles to Sinuiju
This is one of the most bizarre contracts thus far. In it, Sergei will ask you to courier some items for him to a contact nearby. In order to reach them, you'll have to take the souped-up street racer and get to each of the items in as little time as possible; the contact is tapping his toes while waiting and will charge extra if you take too long to get to him. This factor represents itself as a timer ticking down in the corner of the screen, but instead of time, it'll be cash that's constantly draining. If you don't want to void the contract, you'll have to hit each destination before the cash runs down to zero; each pickup will net you successively larger amounts of cash and time to get to the next checkpoint, until you finally reach the contact at the docks in Sinuiju.
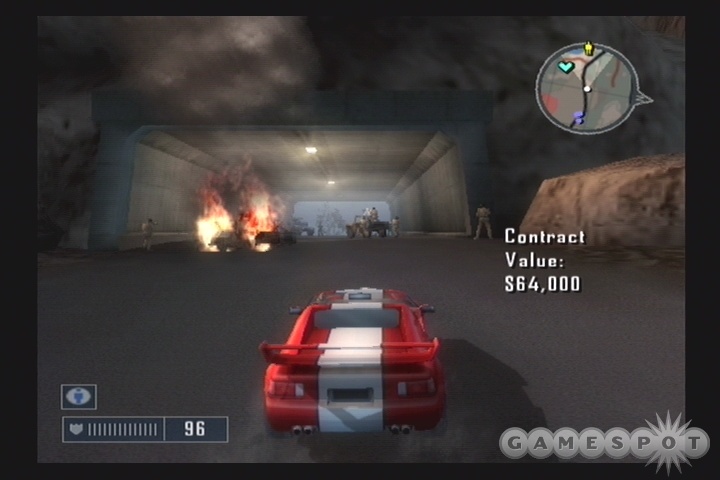
The main problem here lies more in the fragility of the car than in the timer. After you get past the first couple of pickups, you'll find the timer increasing by larger amounts, so you won't have to worry about speeding too quickly from point to point. The main area to be concerned with, then, is the damn car; it's incredibly porous in terms of damage, so you'll need to treat it like a baby. You can let it out when you're on the open road, but after you pick up the first item, the American Passports, you'll need to be much more aware of obstacles in the road, as it'll become littered with both detritus, such as crates and the ruins of war. In addition, you'll stumble across numerous fights between the NK forces and various other factions. Luckily, the civilian disguise afforded to you by the street racer will let you get past most of these fights without too much trouble, so long as you don't do anything stupid like honk your horn over and over again.
Anyway, your trip will take you through Yongbyon Reactors to Chongju, and from there all the way up to Sonuiju Harbor. So long as you can keep your disguise up by not getting out of your car until you're out of sight of factional forces, you should be all right; just slow down when you see a fight up ahead and then carefully weave your way through without running into the path of a rocket.
Contract: Raw Materials
Ah, the King of Hearts. He's been holed up in a previously-abandoned base, and Sergei's going to let you know precisely where he is. Your mission? What else: you have to go in and verify him. As a bonus, you'll be able to earn 100k cash if you destroy all of the SA-8 launchers in the garrison. This is doable, but not entirely necessary, even if the reward is good.
Of course, no face card is going to be without strong defenses, and the King is no different; he's got a whole batallion of men at his command, along with a few helicopters, a couple of tanks, multiple anti-air launchers, and a couple of jammers, all spread out in the forest garrison. Your first goal is going to be to enter the base undetected; the easiest way to do this is to just jack one of the civilian cars near the Mafia HQ, but if you wish, you can also call in a North Korean APC and load it up with Mafia troops.
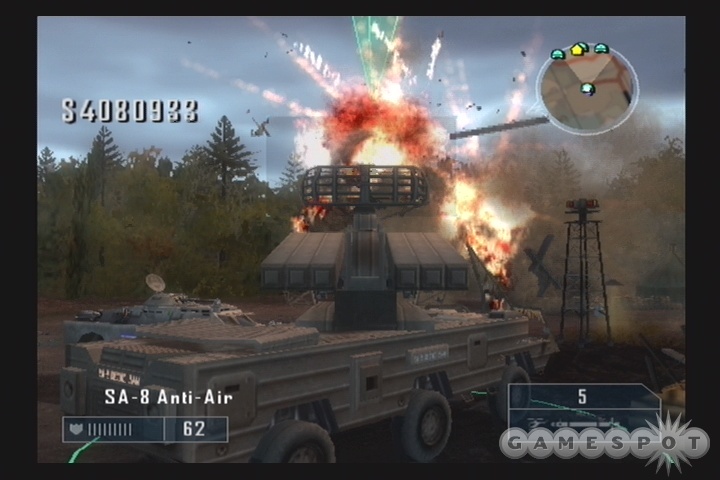
When you reach the garrison, you'll probably want to take out the jammer to the right of the entrance at first, but you'll have to be careful in so doing, as you'll be rousing the sleeping giant. When you're spotted, all three of the helicopters will take off from their respective landing pads, although one of them will be right next to the jammer, allowing you to jack it if you wish. Each of these choppers has a minigun, and a pair of anti-vehicle rockets (you can switch between weapons with the R2 button). If you're quick, you can probably zoom over to two of the AA vehicles and take them out with the anti-vehicle rockets, but you'll be risking a shoot-down from the AA rockets that they fire. Getting rid of the jammer should let you call in support, though, so if need be, don't hesitate to call in for Air Superiority, which should clear out all of your aerial foes in the blink of an eye.
We're making this sound a lot simpler than it is; you're going to have some trouble surviving here, especially due to the fact that NK troops will be continually pouring out of the tents in the area. There is a crate with health near the jammer here, but the area with the first AA vehicle seems to be dry, so you should try to stay inside a vehicle as often as possible. If you can, try to jack one of the T-62 tanks that are further to the east, as they'll let you pound the tents without a problem. In point of fact, this should probably be a priority for you, as the T-62s will be impervious to most fire, save for that from the helicopter rockets and the other tank; there aren't many RPG soldiers in the area, if any.
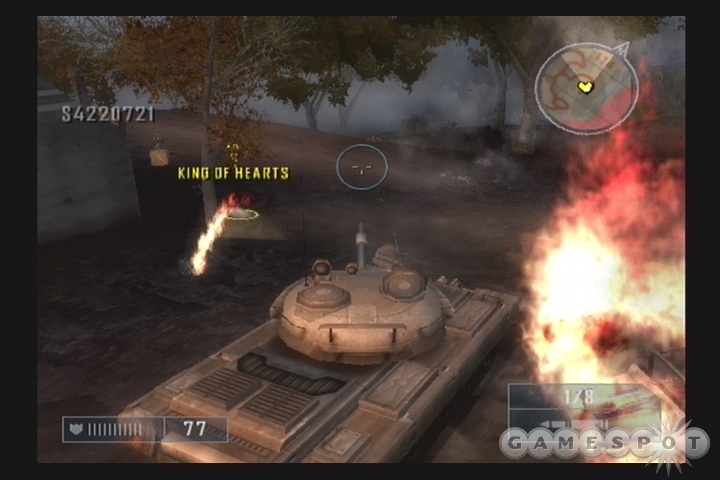
When you reach the bunker where the King is holed up, destroy the nearby jammer and AA vehicle, then call in your Bunker Buster to blow the bunker itself. The King will pop out in a jeep, along with a gunner and a driver, making it a difficult task to get him alive; you'll need to shoot the gunner of the jeep and jack it (while it's moving), which will pop out the King, allowing you to stun and subdue him. You may want to try blocking the path leading back down below with a tank or other large vehicle before blowing the bunker if you want to try and nab the King alive; otherwise, destroying all the AA vehicles will make good most of the 125,000 dollar penalty that you take from killing him. You can also bring one of the T-62's back to the Mafia garage and sell that for another 20,000 or so.
Chinese Contracts
Contract: Manipulate the Data
Colonel Peng wants the CIA code that the South Koreans use to communicate amongst themselves, and you're just the man to bring it to him. In order to reach the South Korean base (listed as NK Outpost on your map), head to the Tenement Ruins; near where the paved road meets up with the dirt one, you can head south to find a little side entrance into the base. Via that entrance, it's relatively easy to get to the code location if you proceed on foot and use the buildings to cover yourself from fire. When you do reach the location marked on your map, hit the triangle button to download the codes.
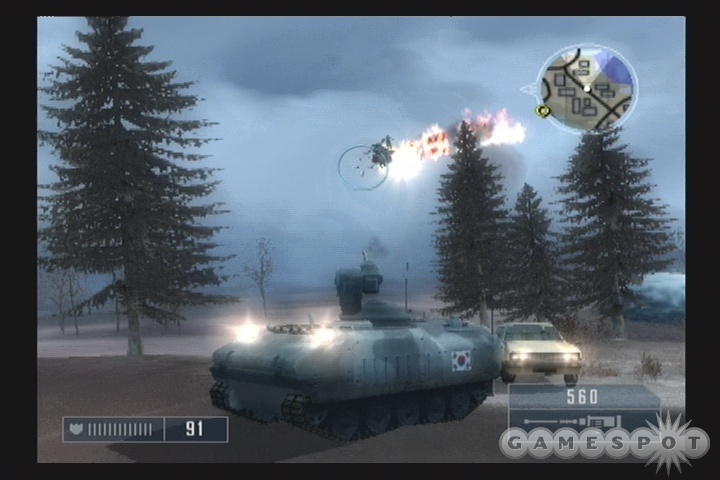
Getting out of the base is going to be the hard part, as there are numerous TOW-equipped scouts around, along with a turret-packing APC near the entrance, and a seemingly infinite number of LHZ attack choppers that will attempt to track you down. You're going to want to jack either a scout or the APC in order to escape. In our opinion, the APC is the better bet, since it'll be armored enough to take a couple of hits from the TOWs and/or the helicopters. You could also just hide out somewhere and call in for a Cluster Bomb or Surgical Strike if you want to take out a few of the vehicles before effecting your escape. When you do get out of the base, head back to the Chinese HQ to nab your bounty and the next mission.
If you're willing to spend some extra cash, then getting a North Korean MD-500 attack chopper delivered can make this mission relatively trivial. Just dash over to the code area, land behind the building, run around, kill the guards, grab the codes, then get back in the chopper and take off. There is AA in the area, but if you approach from the correct direction (the southwest), you should be able to get down and back up again without getting hit.
Contract: Exit Strategy
Now we're talking: the Chinese want you to find and destroy an advance base of the South Koreans in Sinuiju, so that the People's Army can advance behind you and take the city themselves. It's going to be tough to do so, though, since the entire city is considered to be South Korean territory, and that they've got turrets, grenade launchers, APCs, TOW-laden scouts, and helicopters all over the place. In addition, there are a couple of Jammers in the area, so you'll need to take them out before you can use any kind of air support options. The helicopters are going to be a major pain in the butt, so if you have the option to get an anti-air rocket delivered, you might want to do so before heading out to Sinuiju.
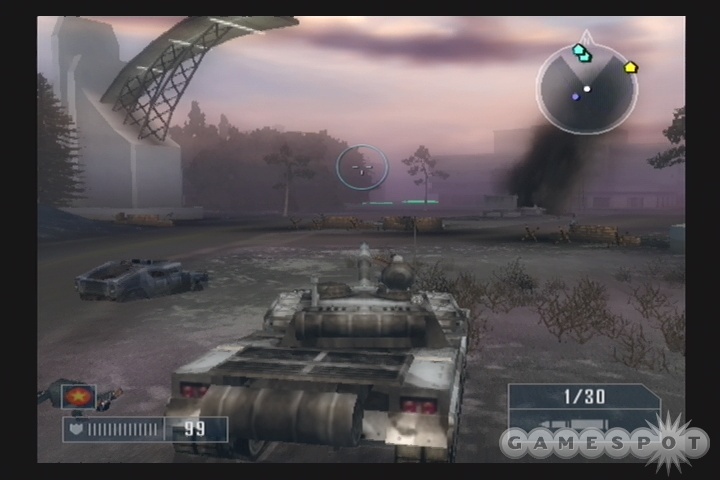
The best way to proceed here is to travel across the bridge and grab one of the Type 52 tanks at the end of it. With a soldier manning the turret, you'll be able to proceed slowly towards the outskirts of Sunuiju, but before you get too far in, start picking off the grenade turrets as they pop into your field of vision; they should be small black spots from a distance away. When they're gone, you should be able to proceed to the line of sandbags there and start firing away at the first of the two bonus targets here; five or six shells will be required to blow it, but it's worth 50,000 dollars, so it'll be worth it. You'll also need to start watching your radar for helicopters at this point. If they fly low enough, you can probably hit them with a shell from the tank, but otherwise you're going to need to leave your tank and take them down with an AA rocket or your primary weapon. If you manage to get all three of the helicopters in the area on your butt, then you might just want to get out of your vehicle, find a hiding spot between some buildings, and use your Air Superiority special attack to blow them all away.
If your tank gets blown away, and it likely will, then you can either attempt to return to the bridge and grab the other one, or jack one of the South Korean K200 APCs. The latter is probably the better option, albeit a difficult one, as the turrets on these guys will pelt you with rapid-fire explosives as you approach, making it hard to get close enough to them to hijack them. Still, if you actually do manage to take one over, then you'll have more than enough ammo to blow all three of your target buildings, with enough left over for any other targets of opportunity in the area. The K200's are also more capable than the Type 52's at taking down helicopters.
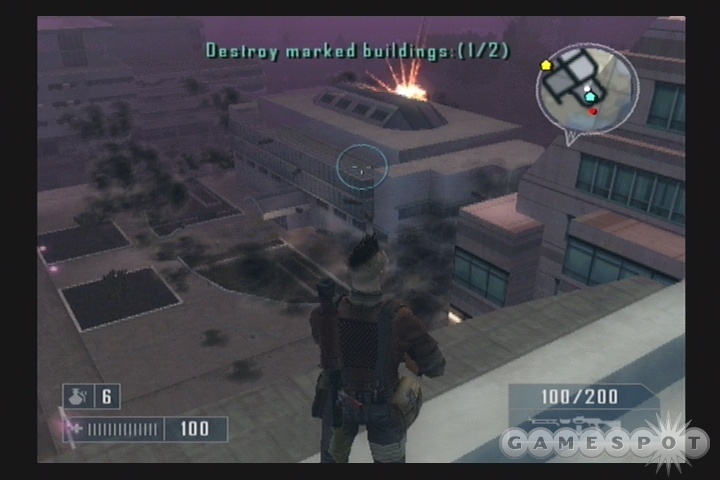
Note that, if you're willing to spend a little extra cash, getting an MD-500 chopper delivered to you can make your task a lot easier, mainly because you can use its two missiles to take out the signal jammers, then land on a building and use a Strategic Missile or Bunker Buster to take down the primary target. This will probably cost you more than you'll make back from the contract, but is the easiest way to clear the mission if you're having trouble with it.
Note also that some of the soldiers inside the city limits pack the awesome Prototype Rifle; if you have a chance to pick one of these up, you'll want to do so.
Contract: Chain Reaction
The Jack of Hearts is apparently somewhere in the vicinity of a broken nuclear reactor, as are Chinese and North Korean forces, whom are engaging in a fierce tank battle. If you accept Peng's contract and help the Chinese forces survive the battle, he'll provide you with the precise location of the Jack. Actually, all you need to do here is get the Jack, but fighting in the tank battle will be part and parcel with that, since the road leading to the reactor is flooded with North Korean tanks.